Build the CycleOps Portal server on VMware ESXi: create the virtual machine, install Ubuntu Server 26.04 LTS, install the Portal, and connect it to the main server.
Ubuntu Server 26.04.1 LTS · VMware ESXi 7.0 U2+
Step 1
Prerequisites
This guide covers building the server that runs the CycleOps Portal, from an empty ESXi host to a Portal connected to the main server. The Portal server is a separate virtual machine from the main server; its address is the value the main installer asks for as the DMZ portal server IP.
Have the following ready before you start:
A VMware ESXi host on version 7.0 U2 or later, and an account allowed to create virtual machines.
At least 100 GB of free datastore space.
The ubuntu-26.04.1-live-server-amd64.iso image (2.73 GB) uploaded to a datastore. See Download the installation image in the main server guide.
A static IP address, subnet, default gateway, and DNS server addresses for the server.
HTTP access (TCP 80) from the server to archive.ubuntu.com, or the address of your proxy.
The items listed in step 7.1 for the Portal installation itself.
In the installer, move with the arrow keys and Tab, toggle an option with Space, and confirm with Enter.
Step 2
Installation parameters
These are the values used throughout this guide. The network values are examples; replace them with the values for your own network.
Parameter
Value
Note
Virtual machine name
CycleOps-Portal
Compatibility
ESXi 7.0 U2 virtual machine
Guest OS
Linux / Ubuntu Linux (64-bit)
vCPU
8
Memory
16 GB
Disk
100 GB
SCSI controller: VMware Paravirtual
Network adapter
VMXNET 3
Port group: LAN
Hostname
cycleops-portal
Administrator user
coadmin
Member of sudo
Network interface
ens192
Subnet
10.0.1.0/24
Example value
IP address
10.0.1.191
Example value
Gateway
10.0.1.1
Example value
DNS servers
8.8.8.8, 8.8.4.4
Example value; use your internal DNS if you have one
Partition: swap
8 GB
Partition: /
ext4, all remaining space
About 91 GB
Step 3
Create the virtual machine
The virtual machine is created with the five-page New virtual machine wizard in ESXi Host Client.
3.1 Start the wizard
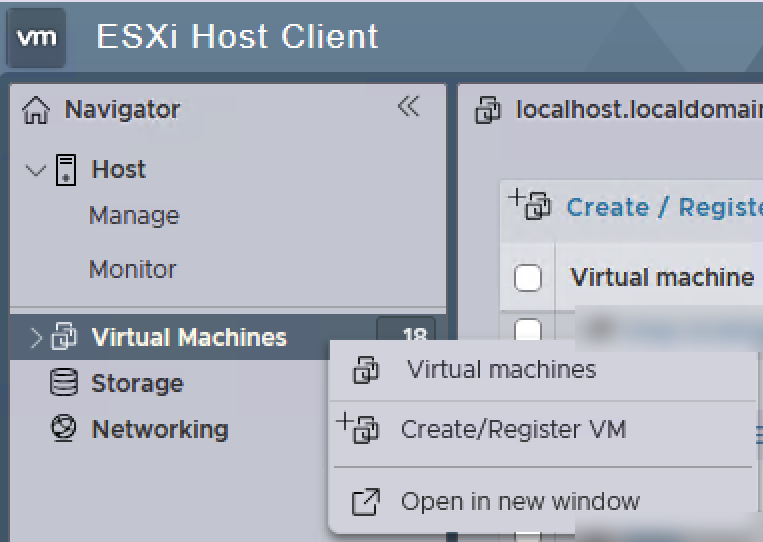
Sign in to ESXi Host Client. In the Navigator, right-click Virtual Machines and select Create/Register VM.
Create/Register VM in the Navigator menu
3.2 Select the creation type
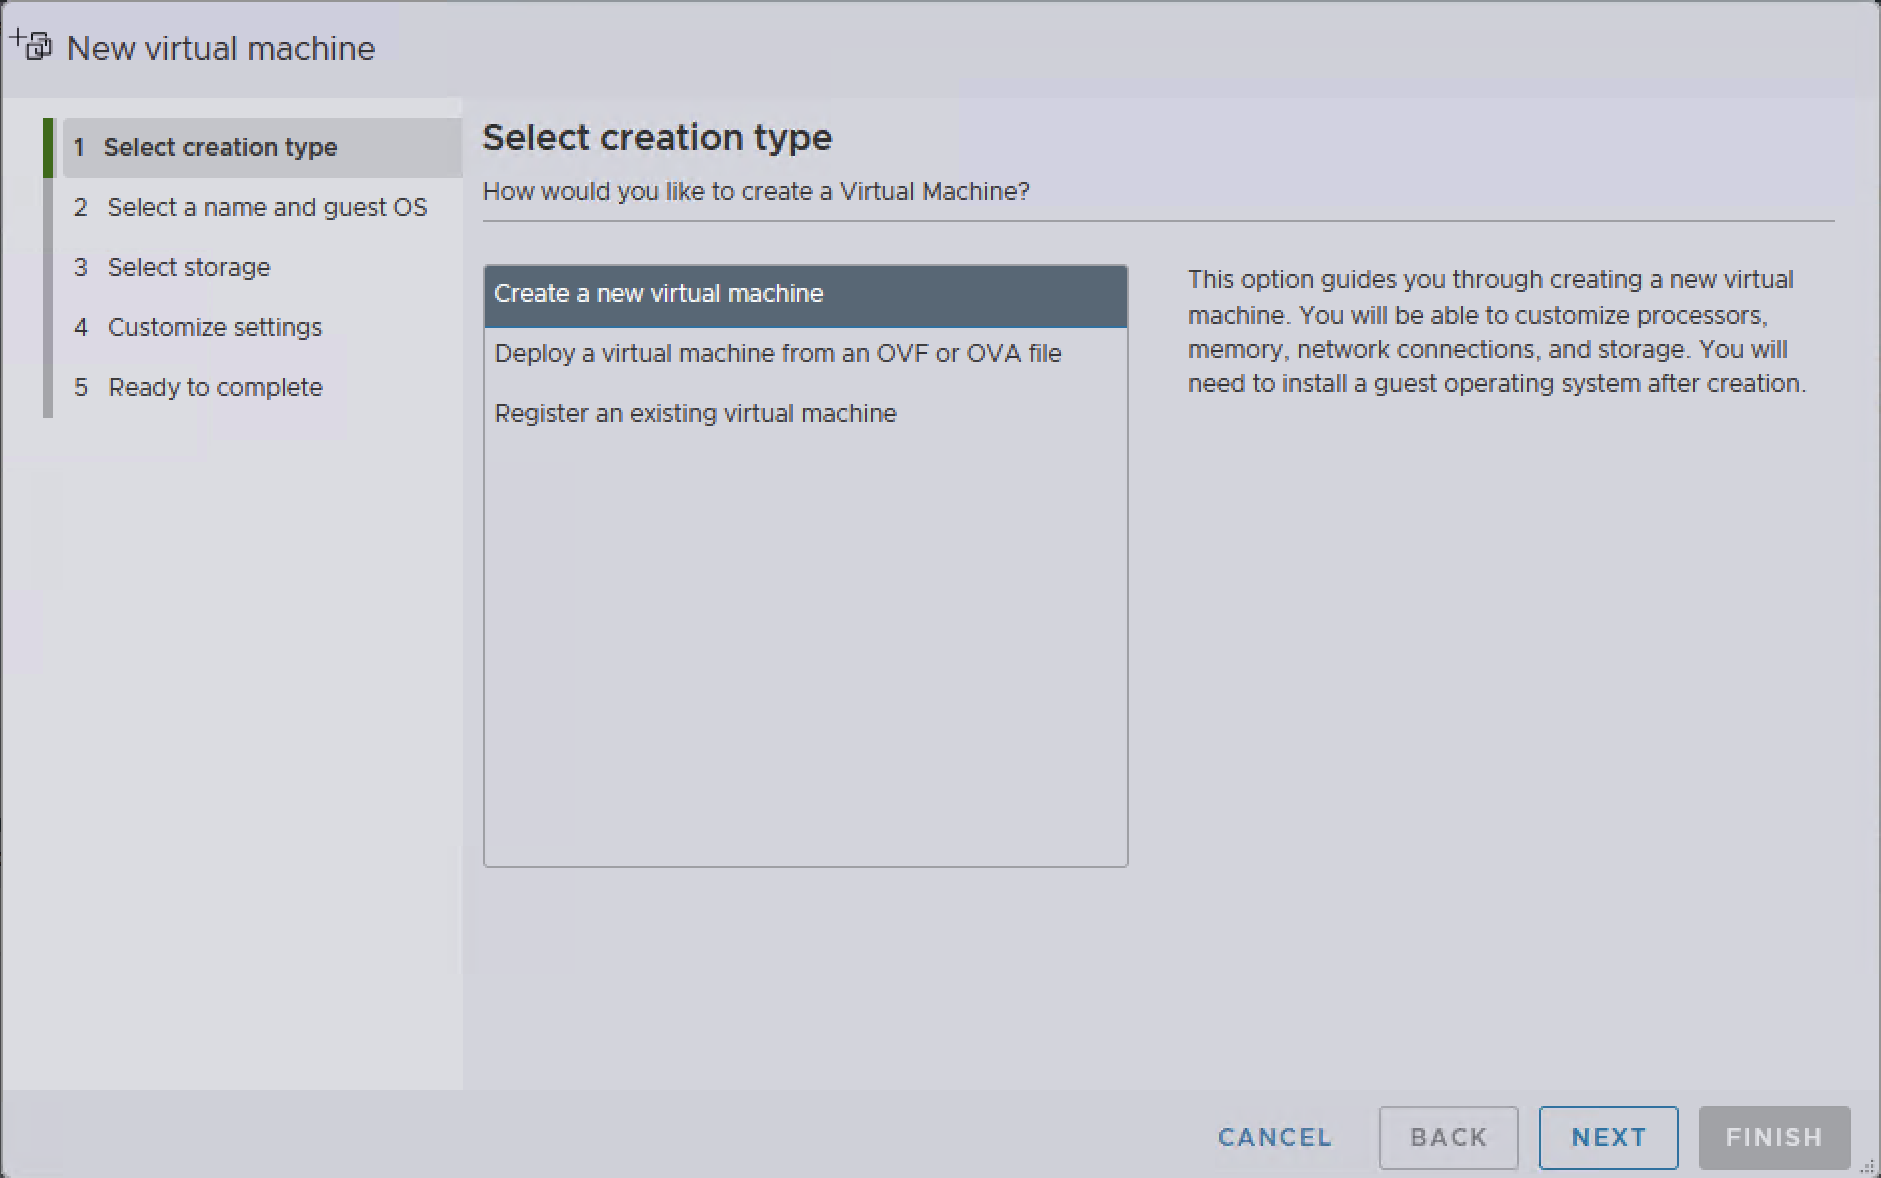
Select Create a new virtual machine and continue with NEXT.
Select creation type
3.3 Set the name and guest OS
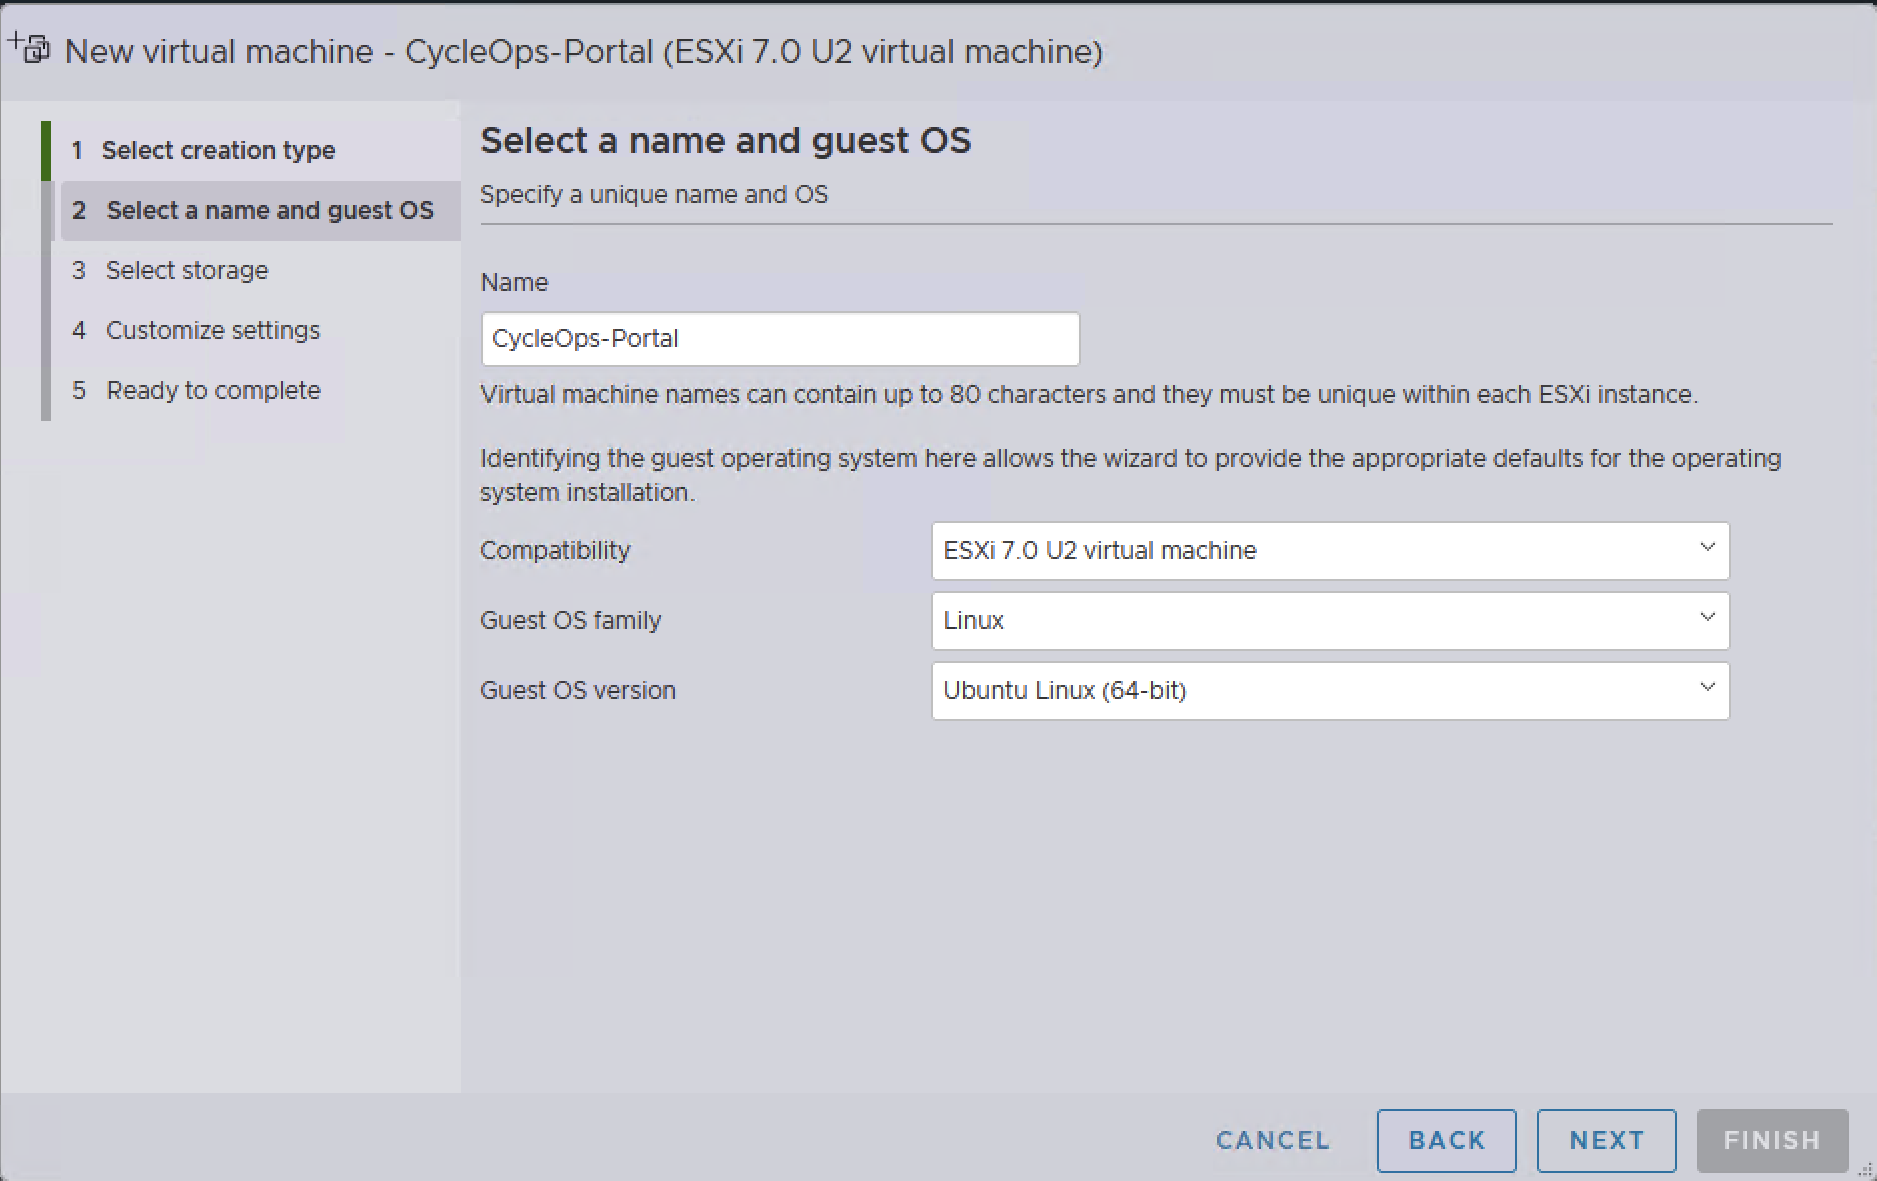
Enter CycleOps-Portal as the name. Select ESXi 7.0 U2 virtual machine for Compatibility, Linux for Guest OS family, and Ubuntu Linux (64-bit) for Guest OS version.
Select a name and guest OS
3.4 Select the datastore
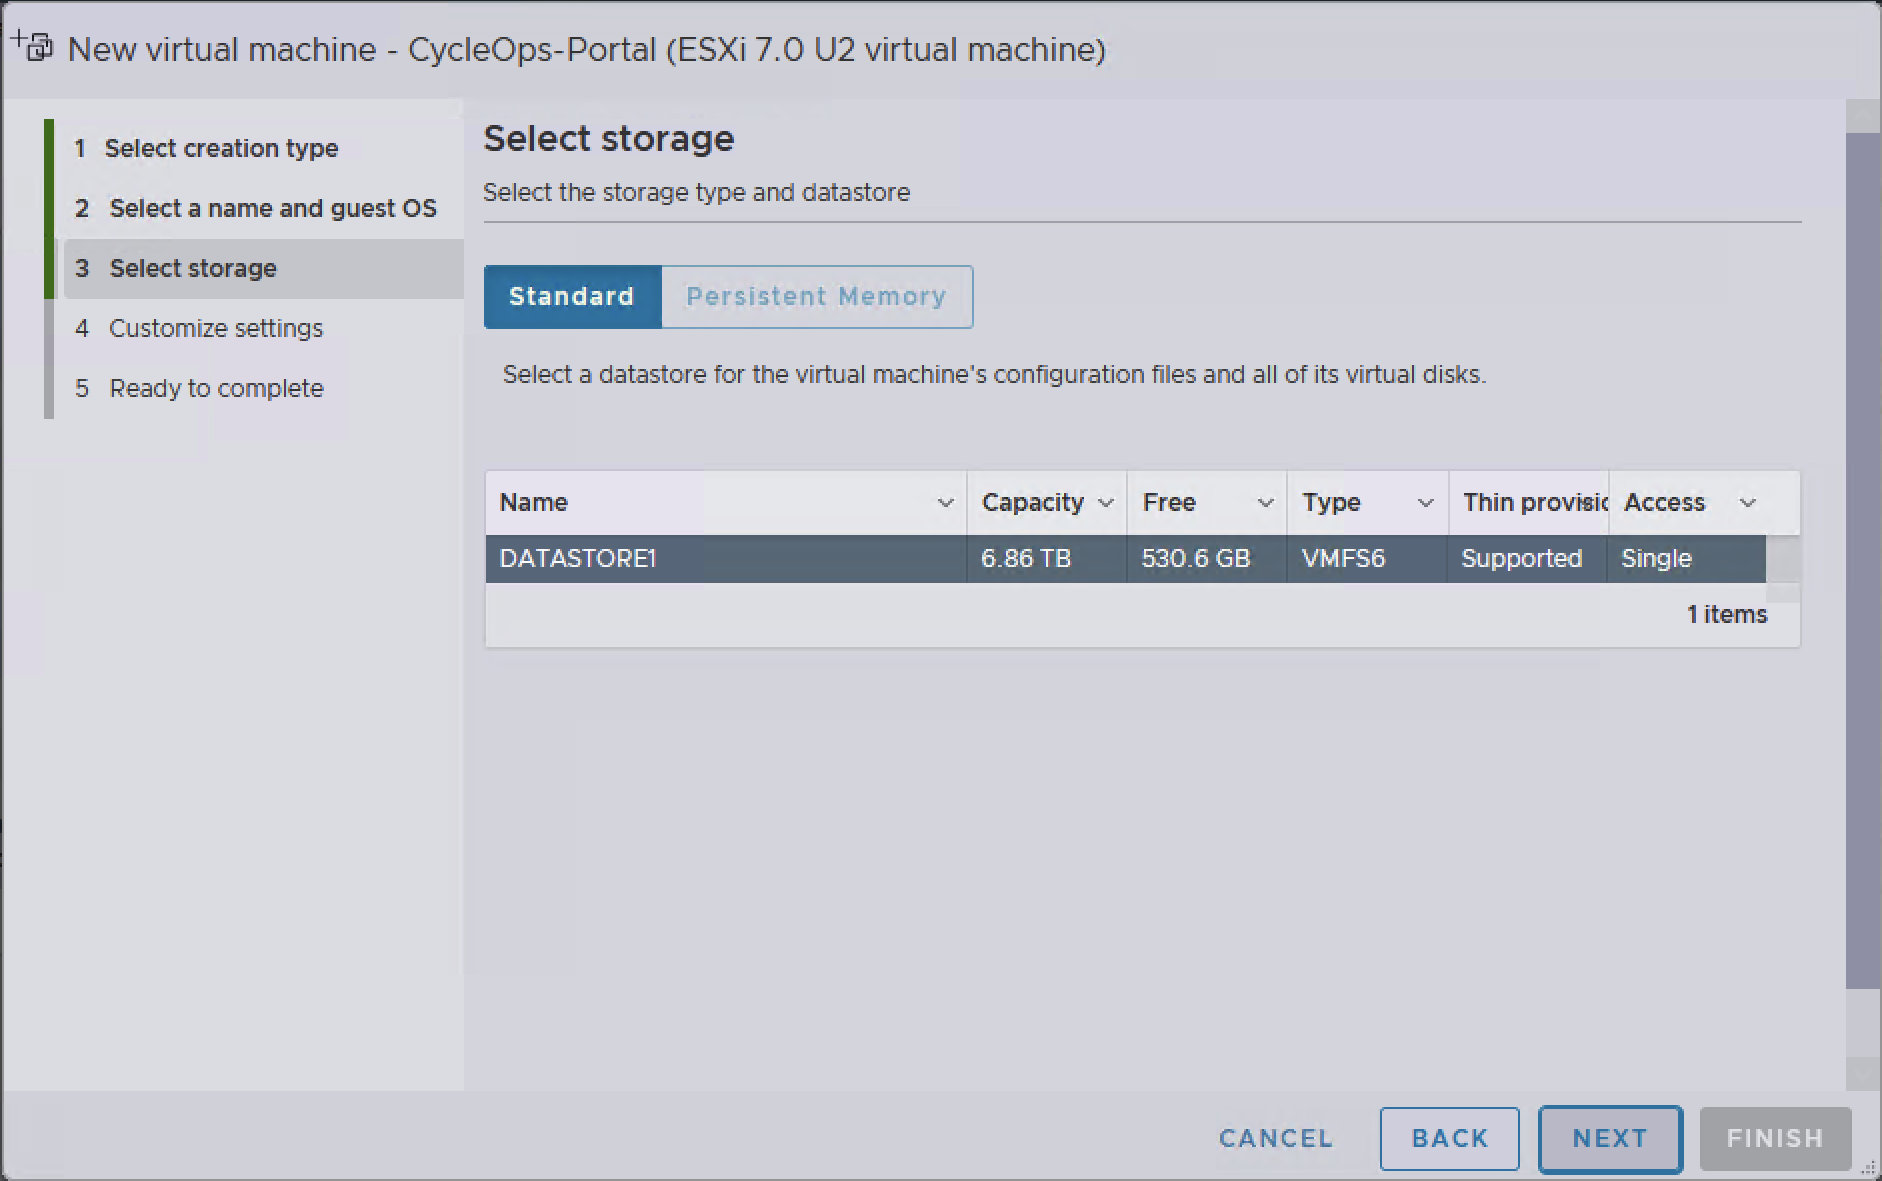
Select the datastore that will hold the virtual machine files. It needs at least 100 GB of free space.
Select storage
3.5 Configure the hardware
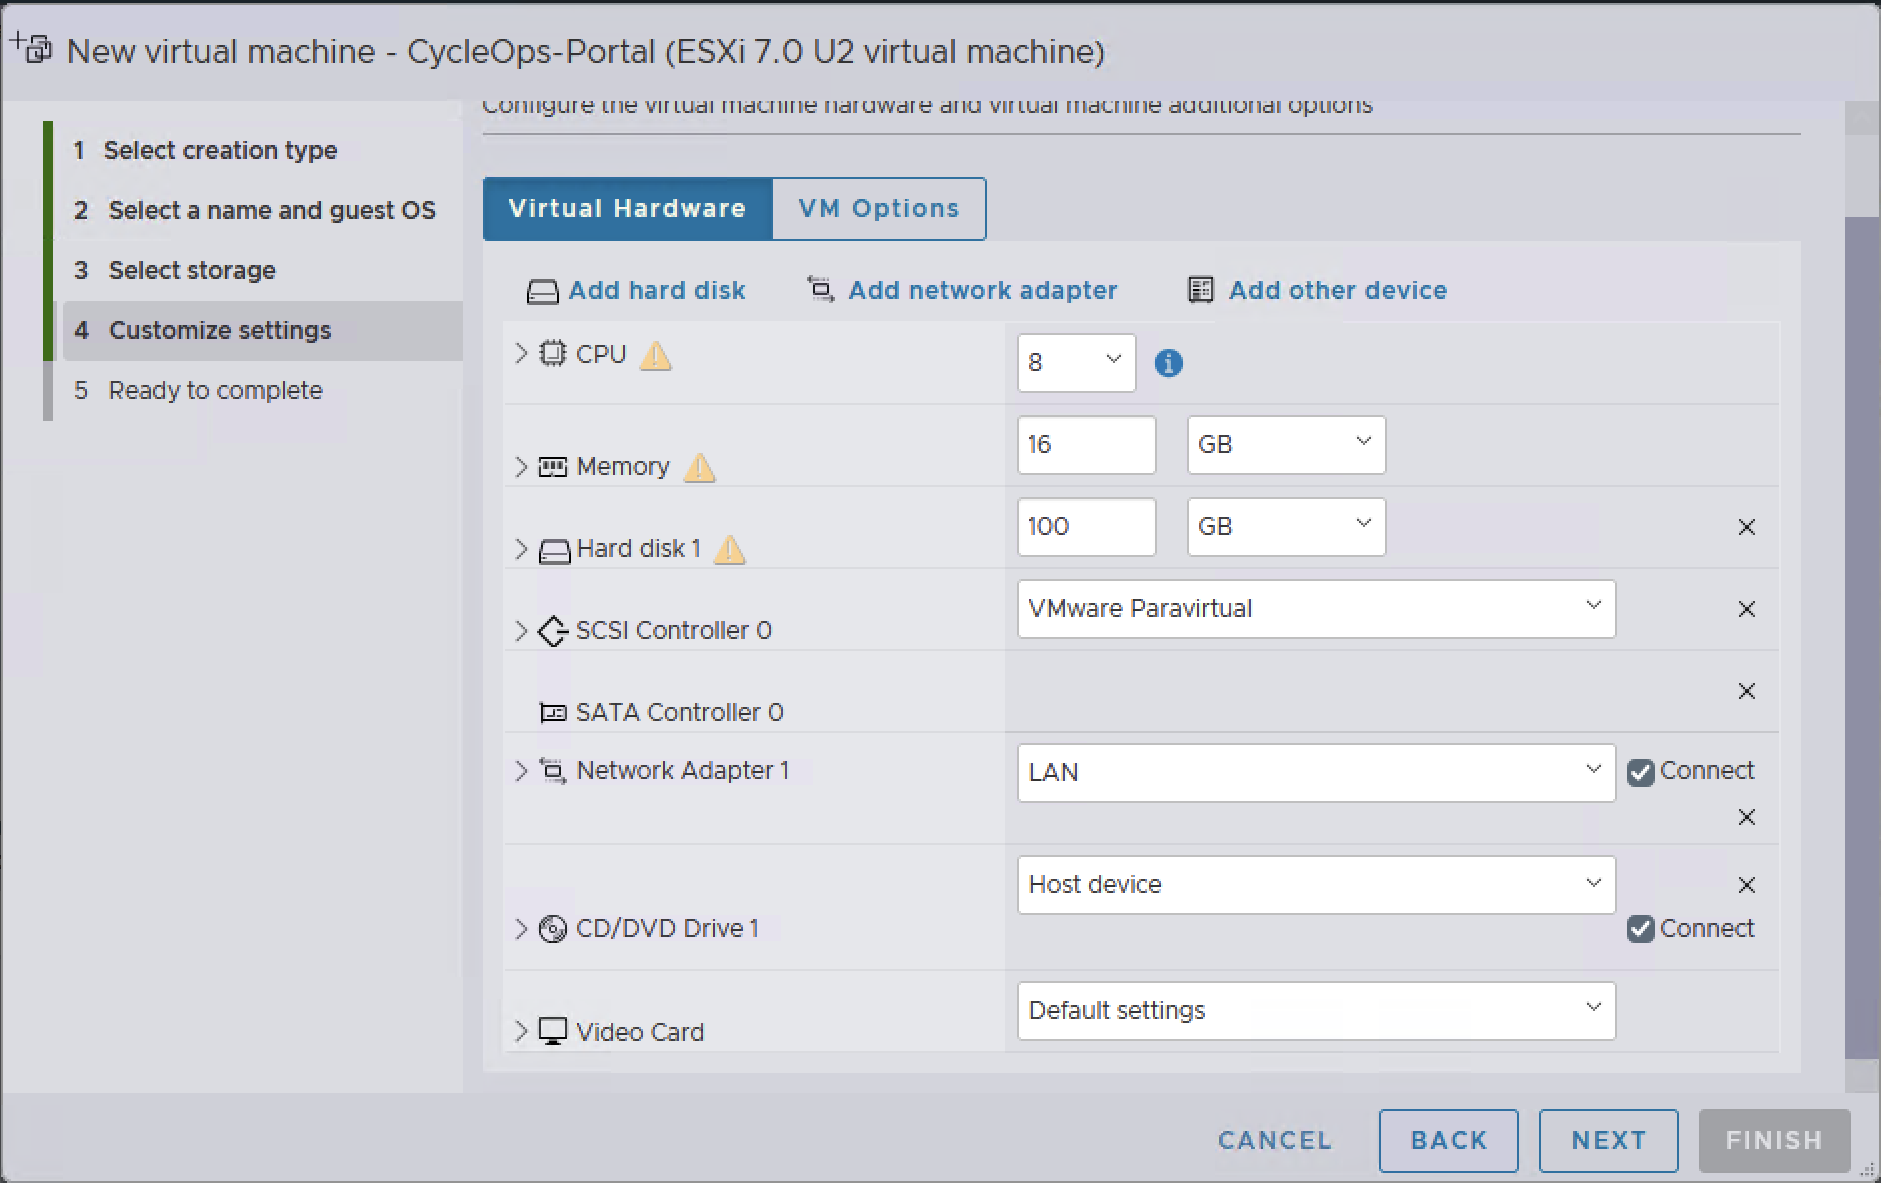
On the Virtual Hardware tab, set CPU to 8, Memory to 16 GB, and Hard disk 1 to 100 GB. Keep SCSI Controller 0 on VMware Paravirtual, and select the port group the server connects to for Network Adapter 1.
CPU, memory, and disk values in Customize settings
3.6 Attach the installation image
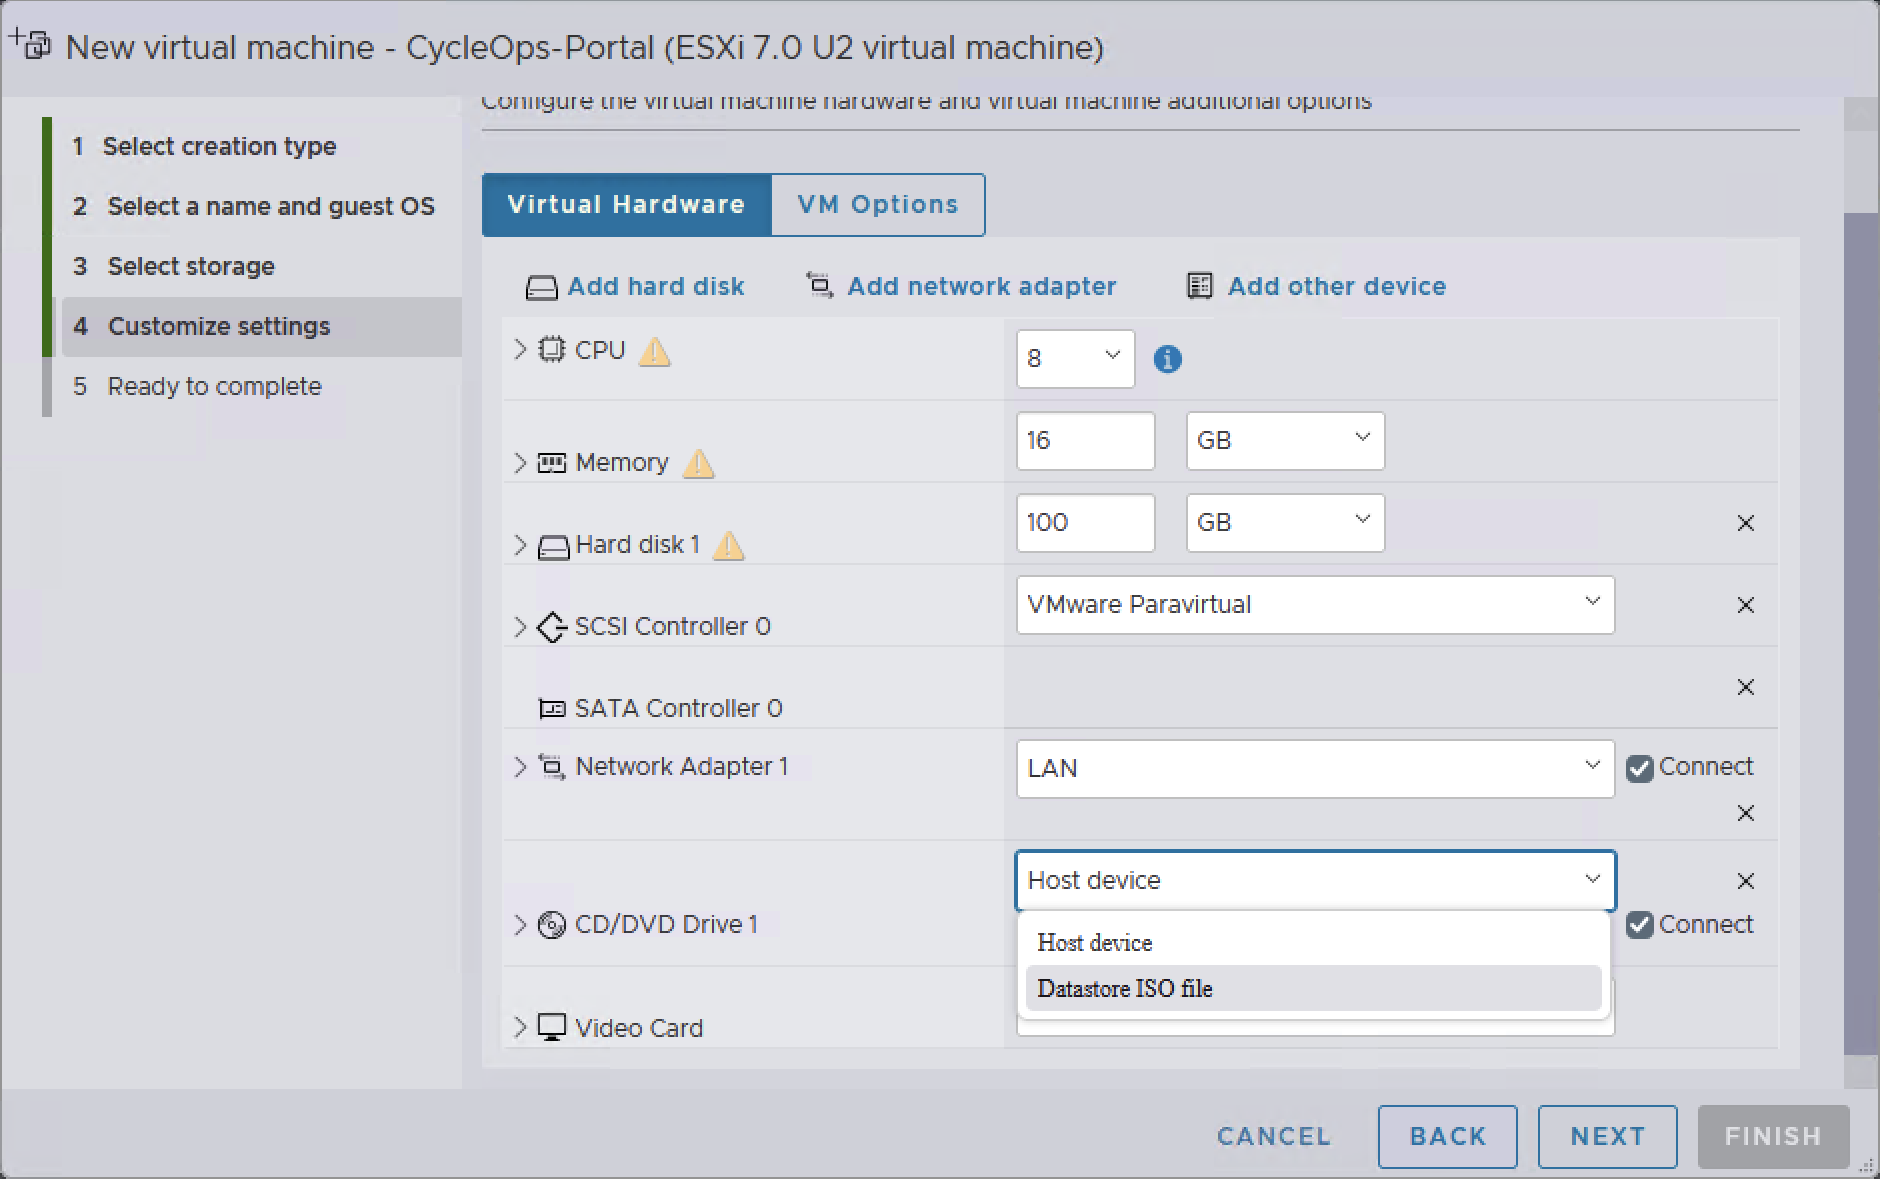
In the CD/DVD Drive 1 row, select Datastore ISO file. In the Datastore browser, locate ubuntu-26.04.1-live-server-amd64.iso and confirm with SELECT.
Selecting Datastore ISO file for CD/DVD Drive 1
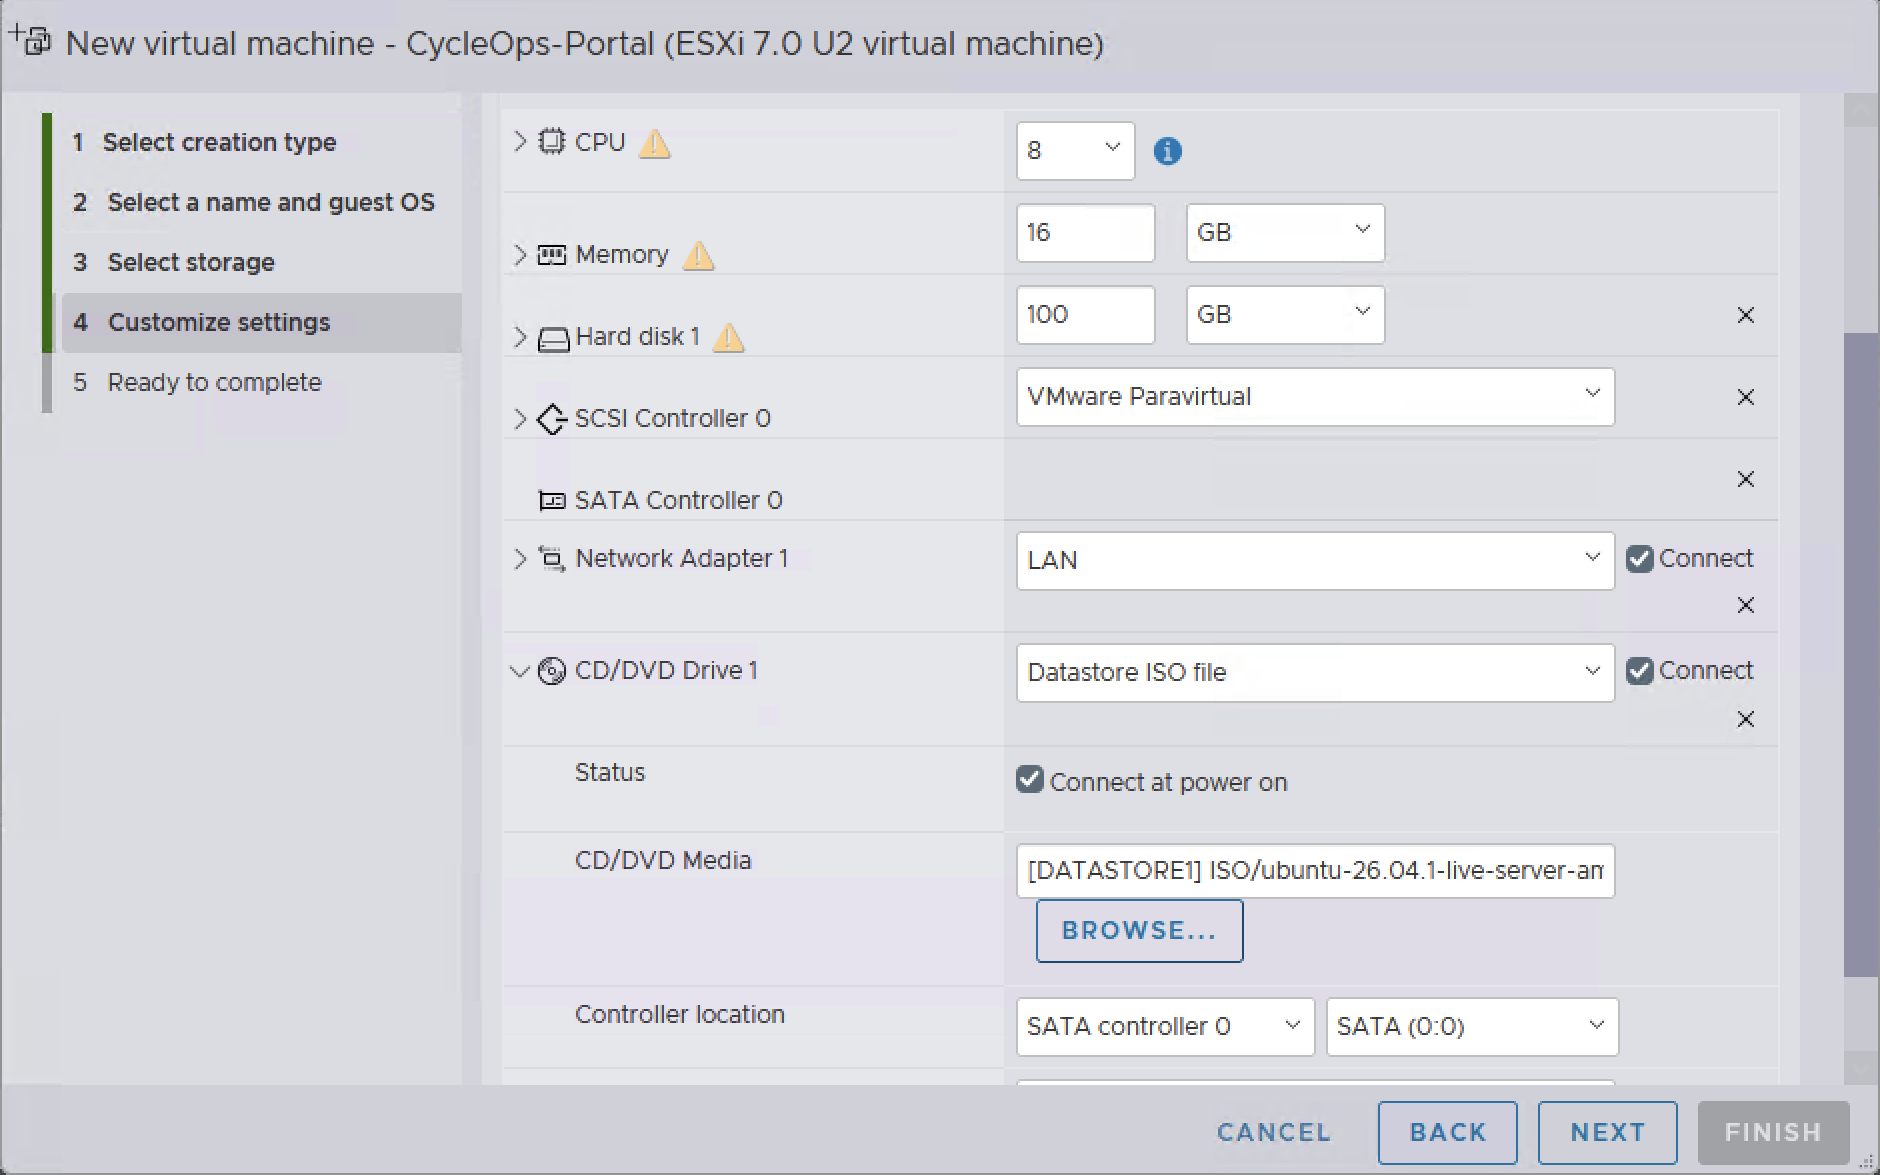
Expand CD/DVD Drive 1 and confirm that Connect at power on is checked and the image path appears under CD/DVD Media. Continue with NEXT.
Image path under CD/DVD Media with Connect at power on checked
3.7 Review and finish
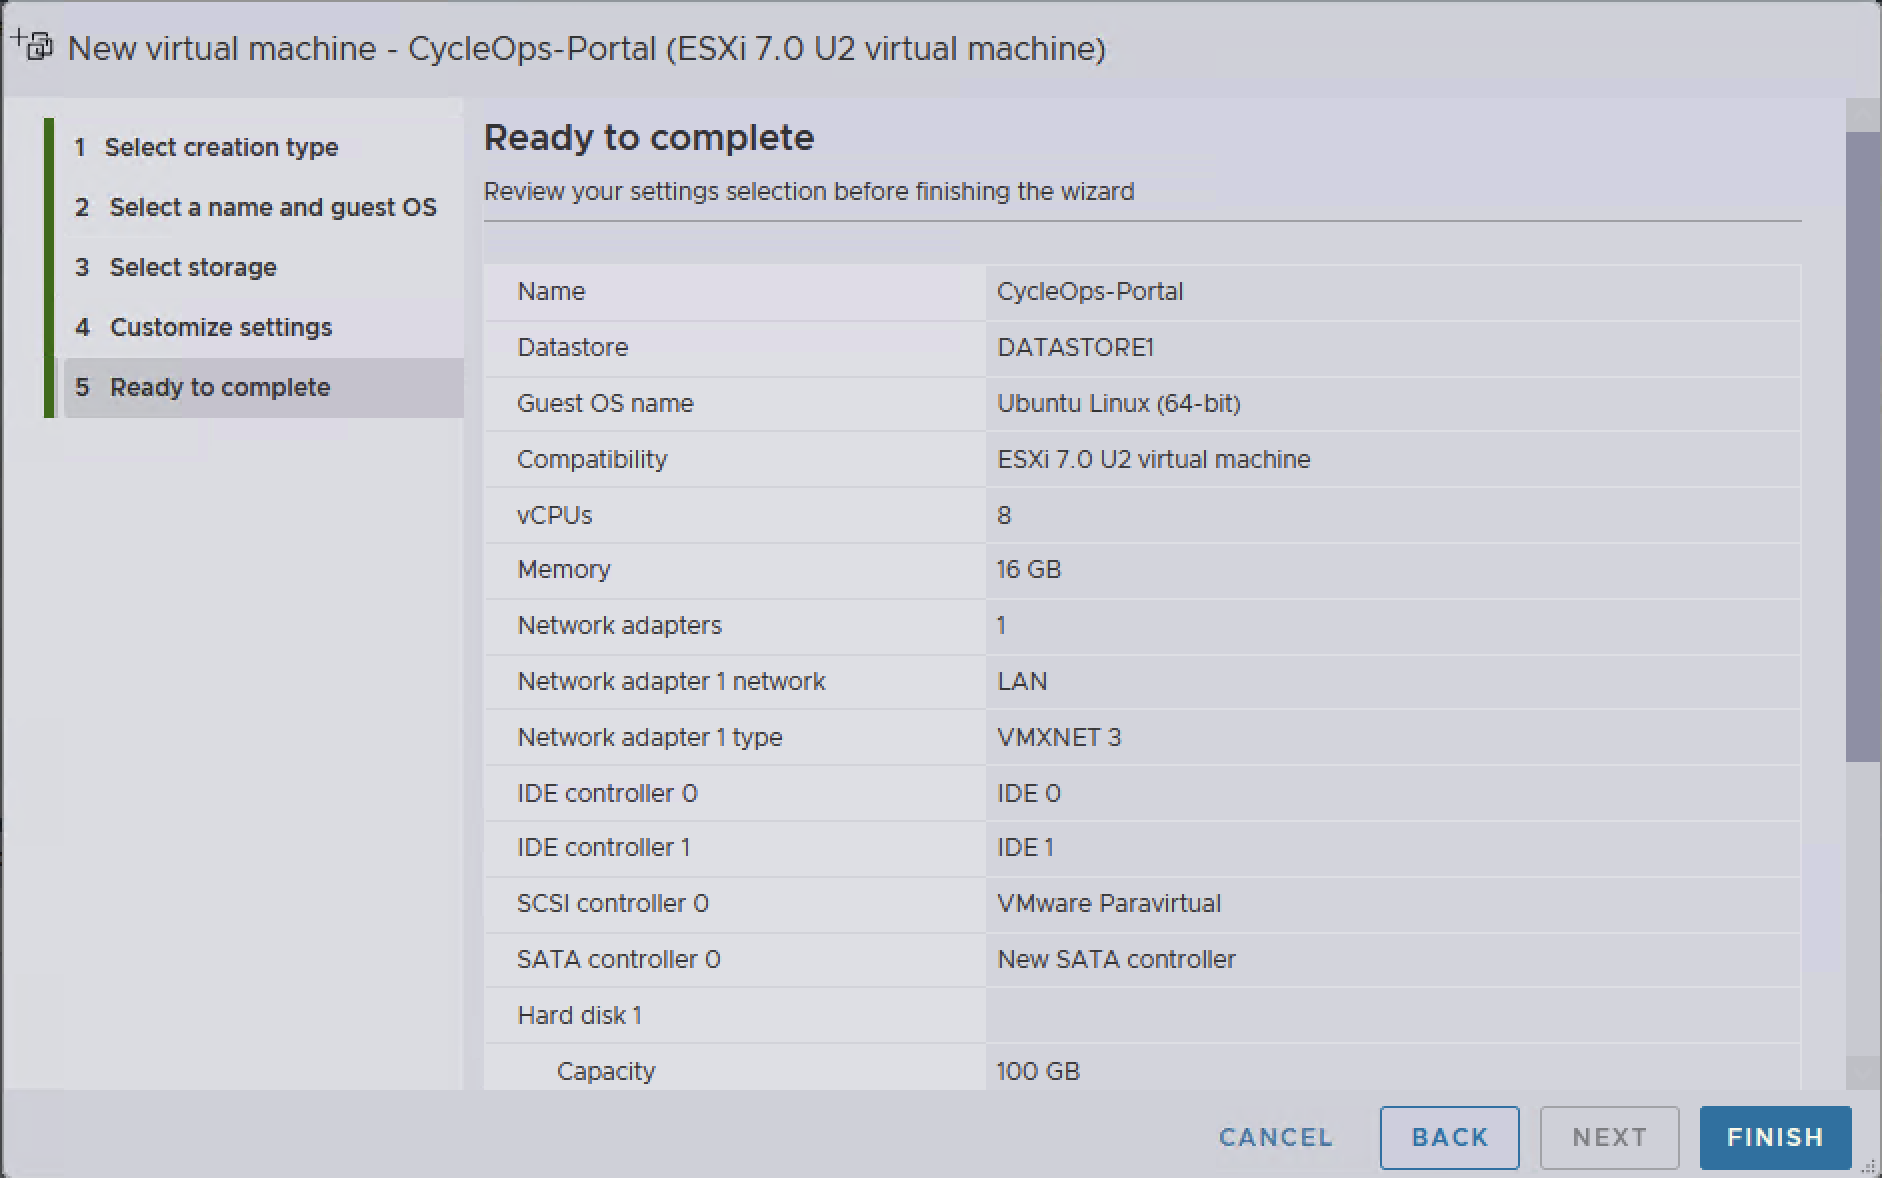
Compare the summary on the Ready to complete page with your parameters, then create the virtual machine with FINISH.
Ready to complete summary
3.8 Power on
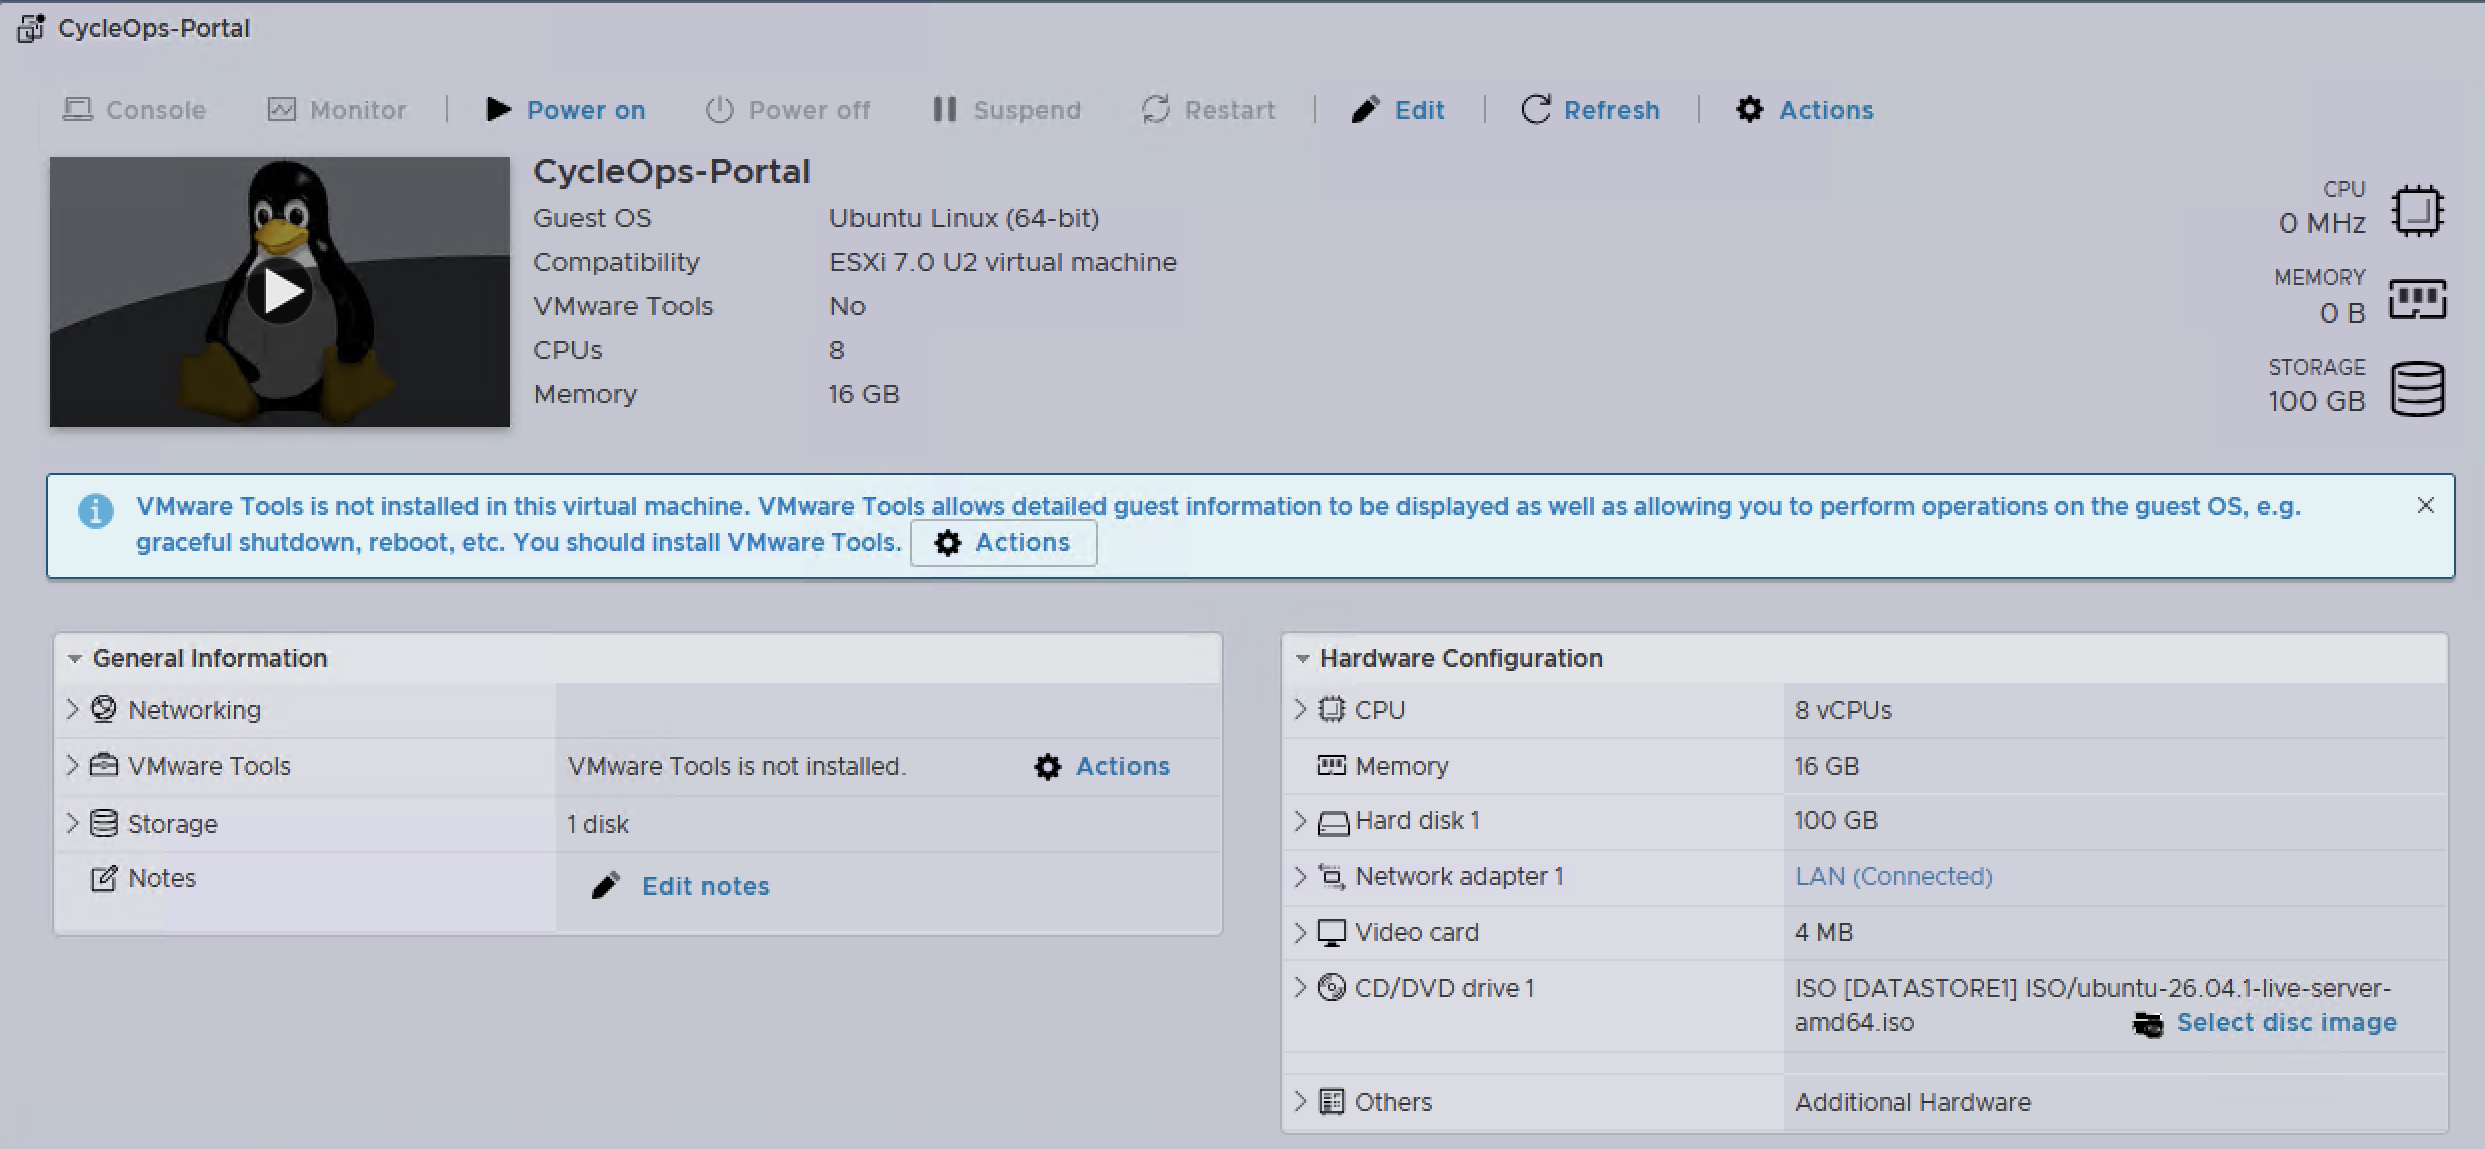
Open CycleOps-Portal from the virtual machine list, select Power on, and open the Console. The "VMware Tools is not installed" notice is expected at this stage.
CycleOps-Portal summary with the Power on buttonStep 4
Install Ubuntu Server 26.04
The operating system is installed from the virtual machine console with the Ubuntu installer.
4.1 Start the installer
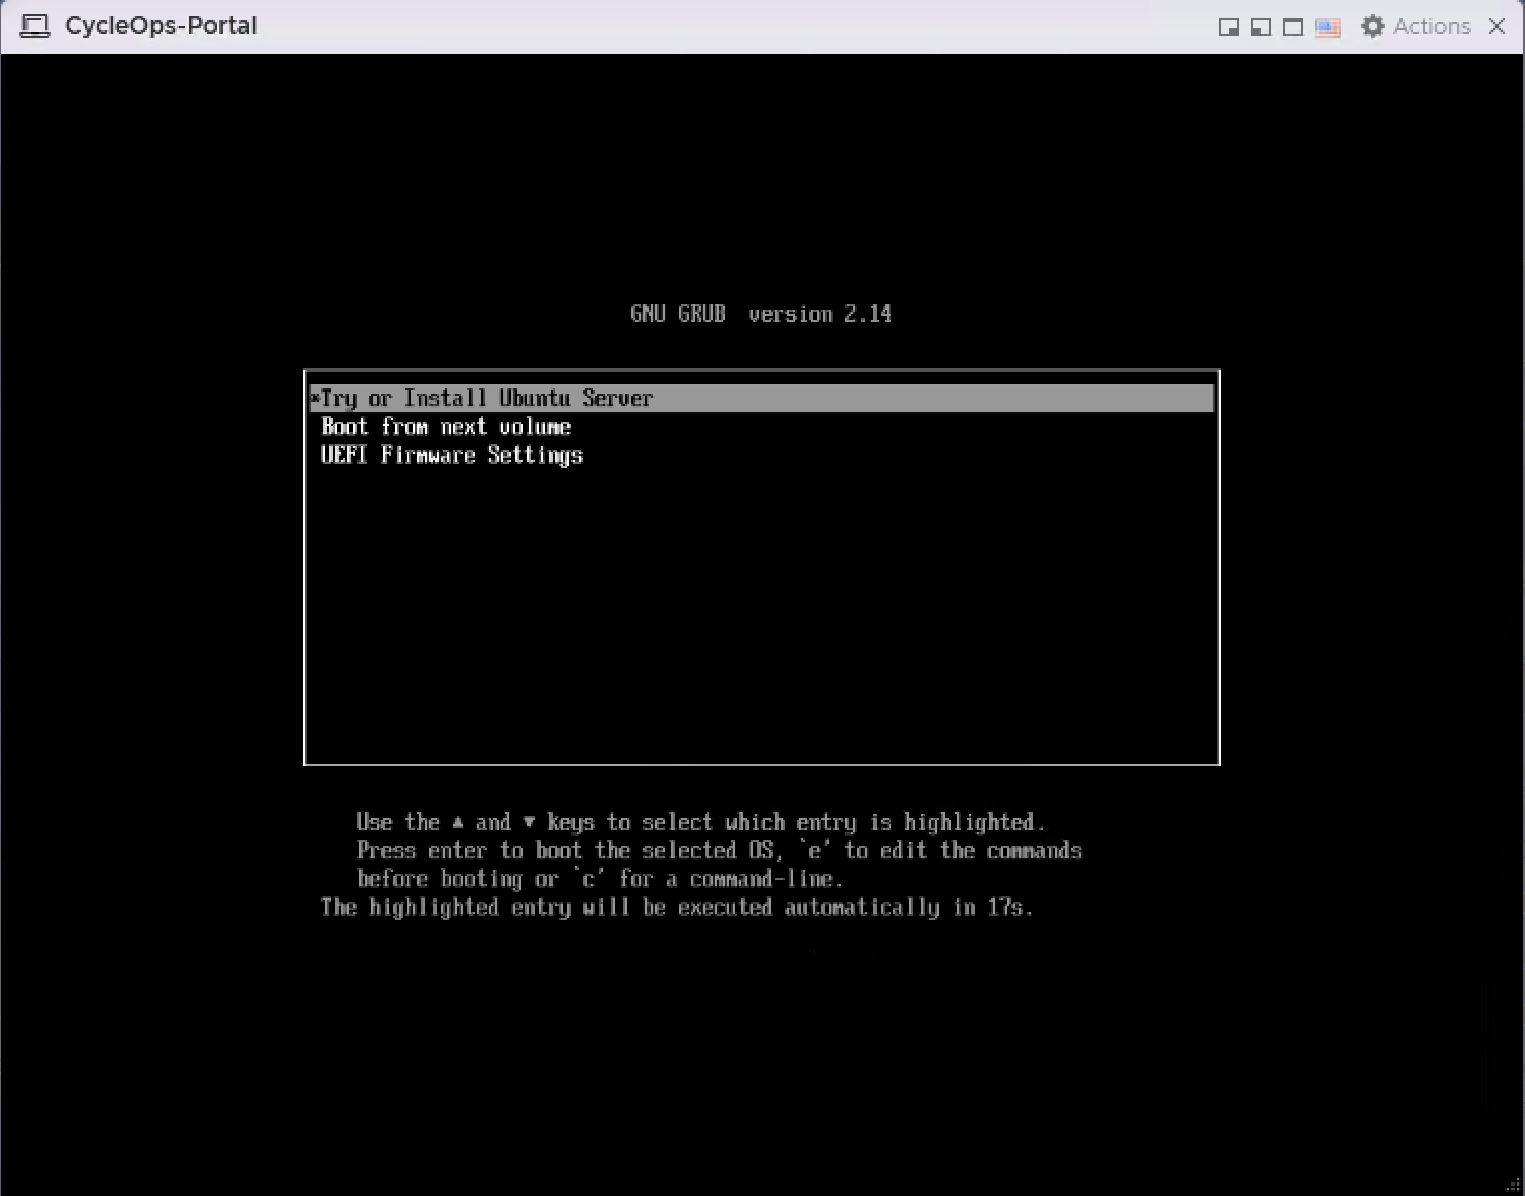
With Try or Install Ubuntu Server highlighted in the GRUB menu, press Enter. Loading the installer can take a minute or two.
Try or Install Ubuntu Server in the GRUB menu
4.2 Language and keyboard
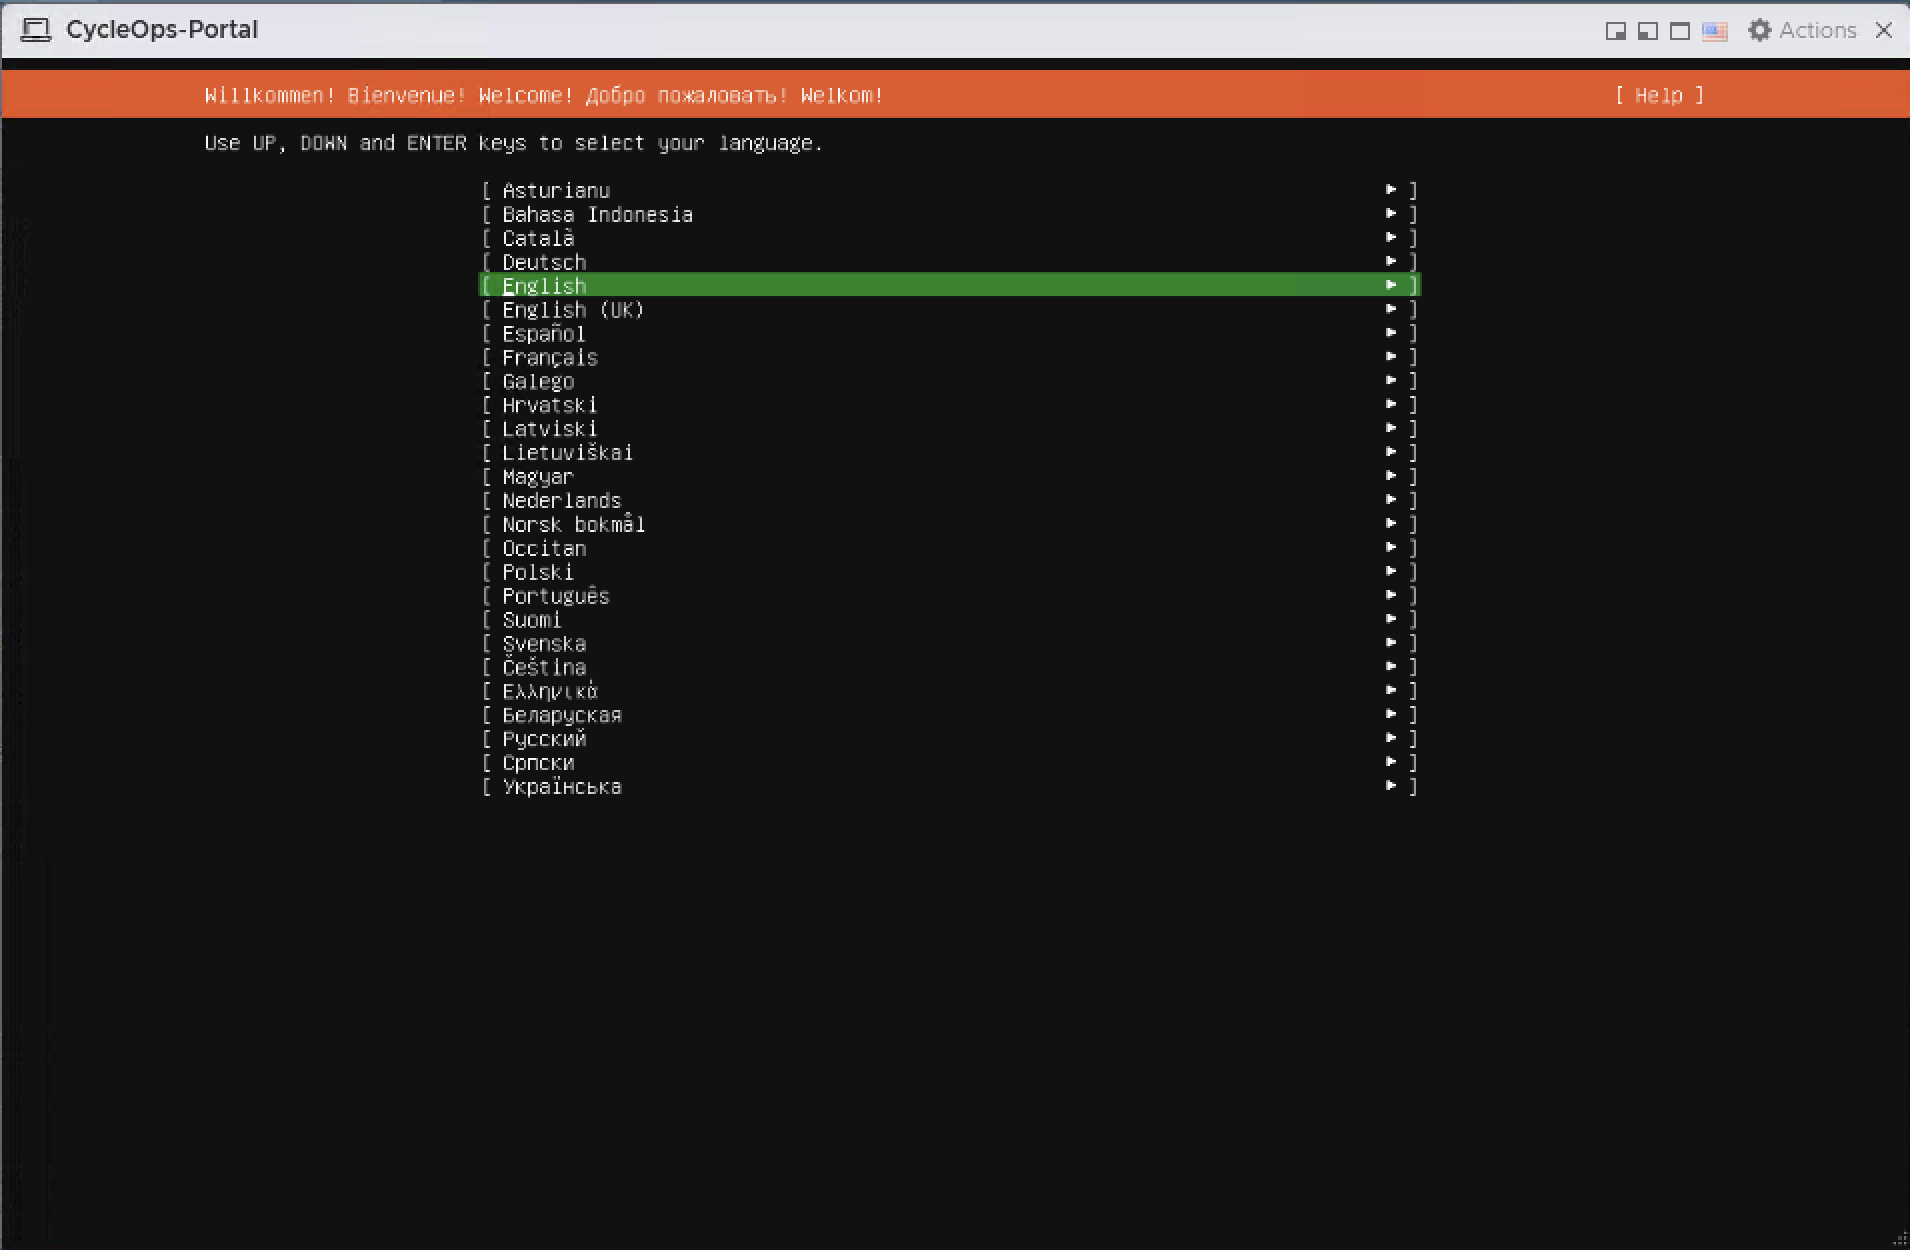
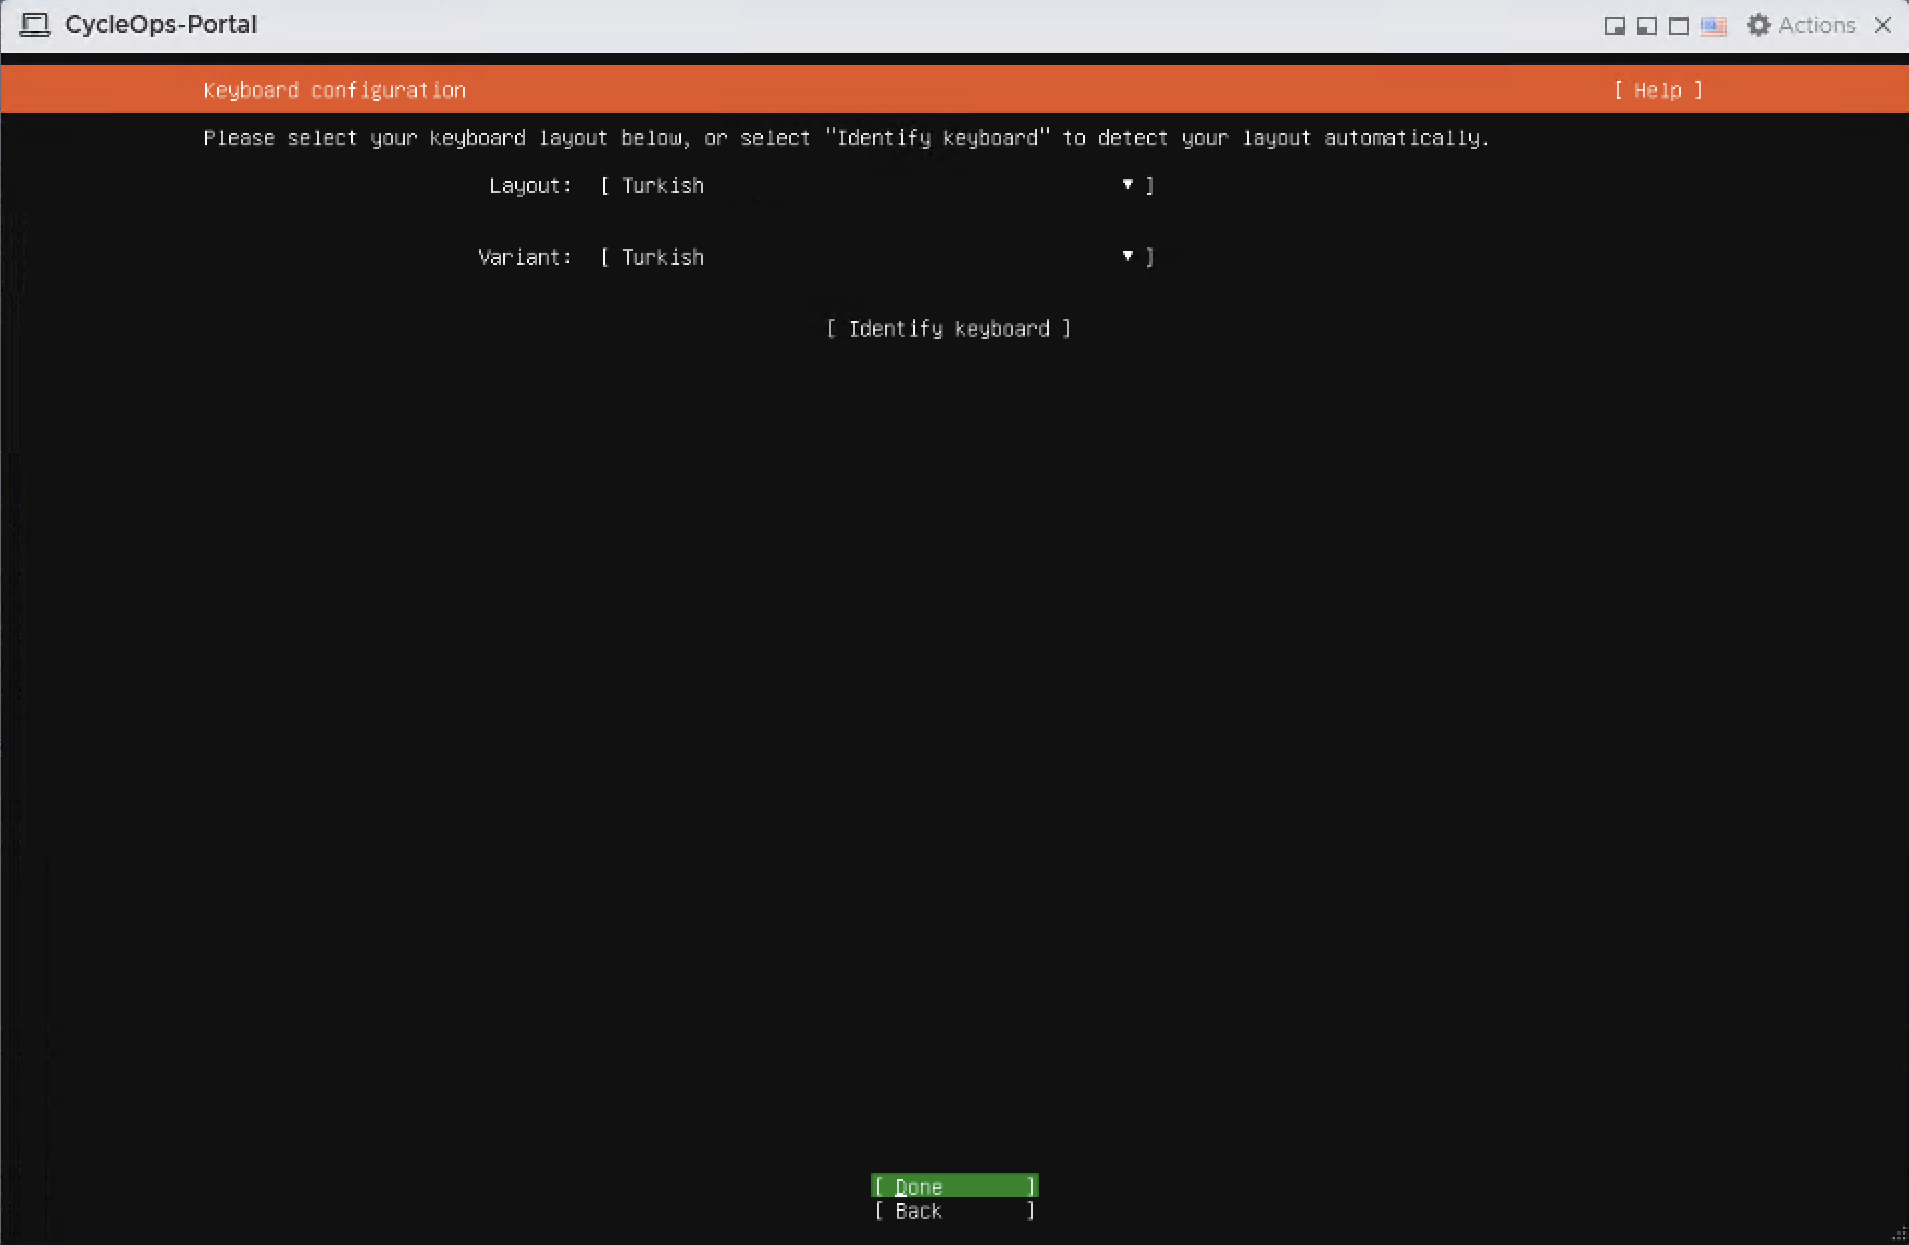
Select English as the language. On the keyboard page, select the layout that matches your keyboard and continue with Done.
Language selectionKeyboard configuration
4.3 Installation type
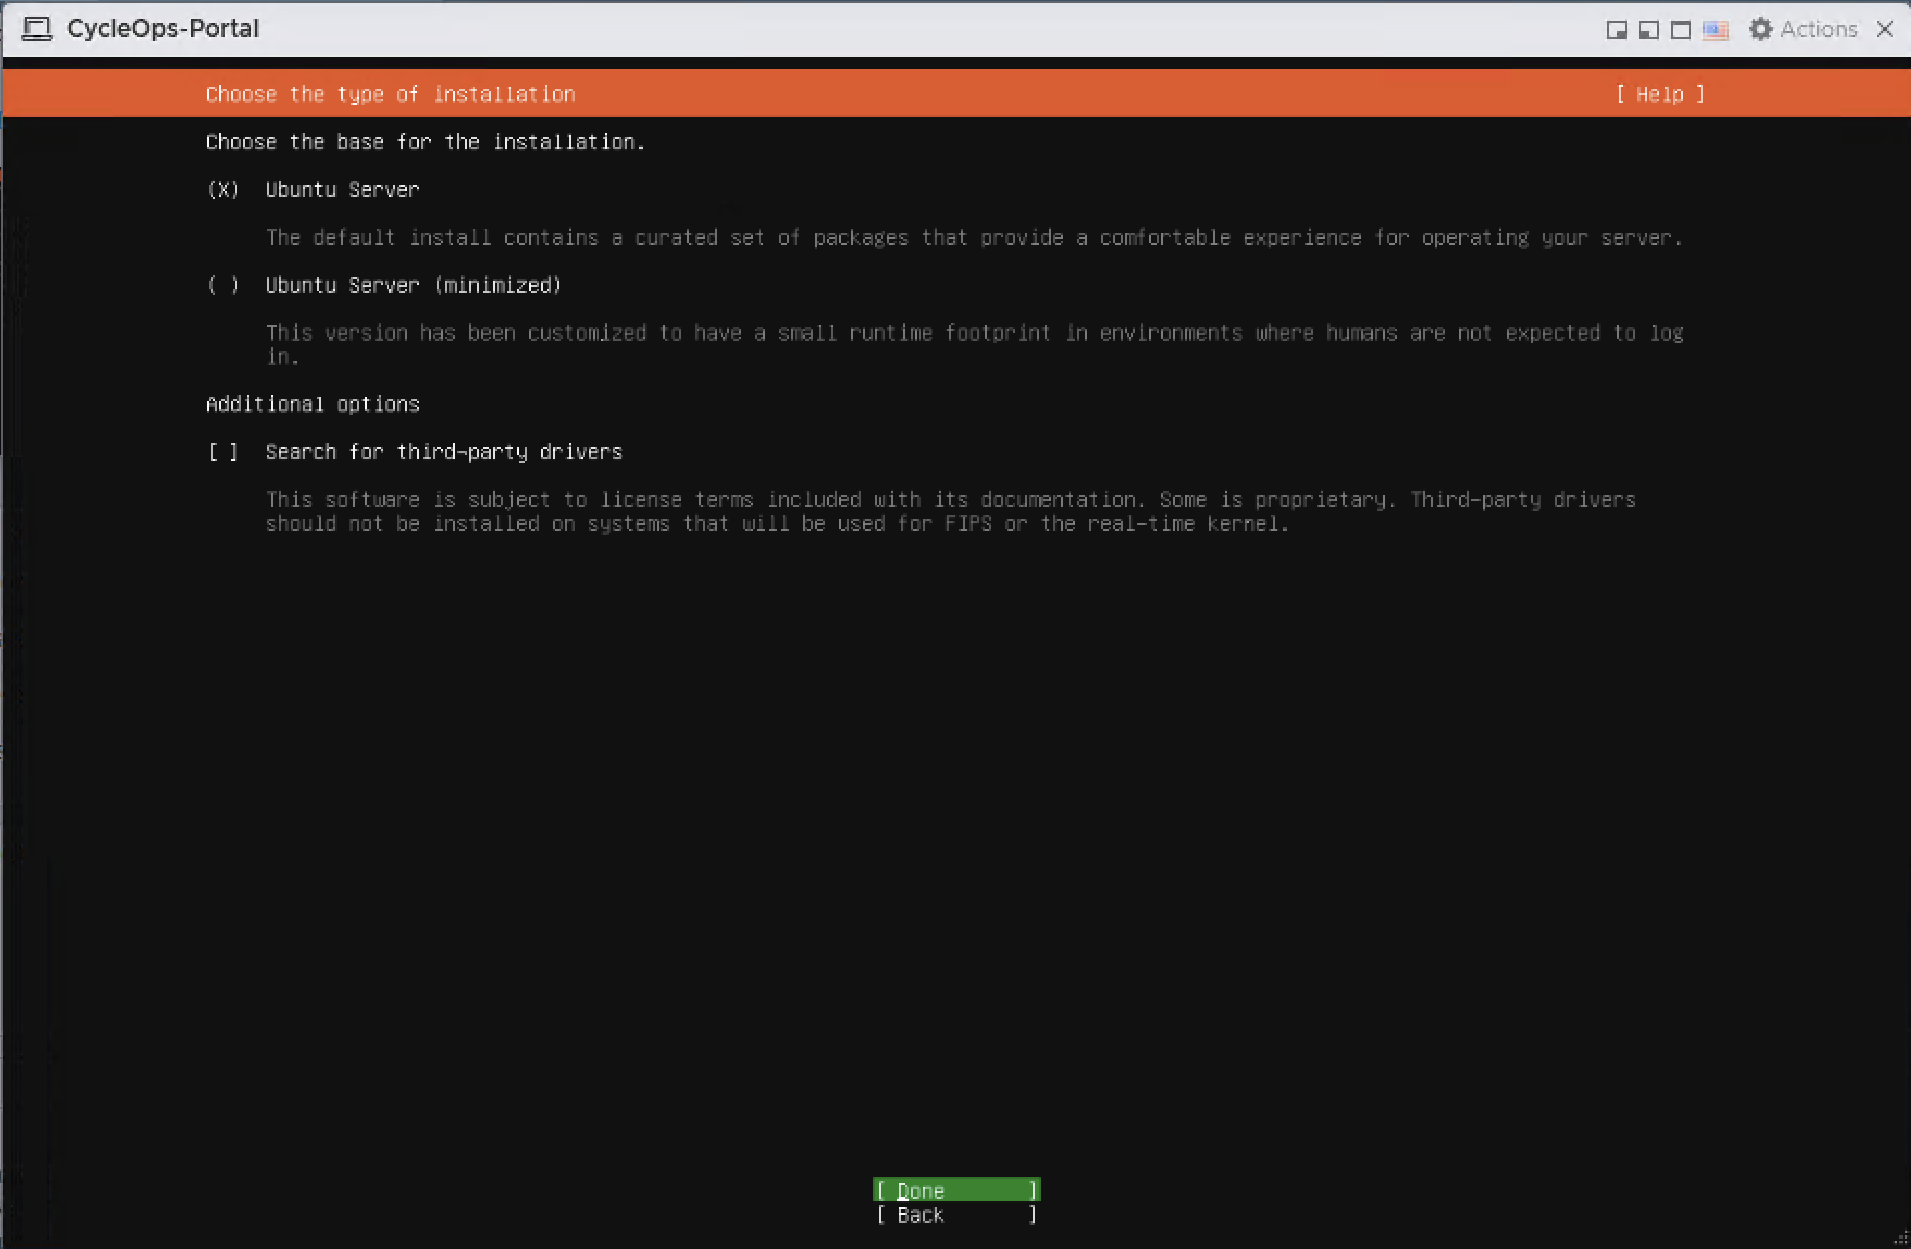
Keep Ubuntu Server selected. Leave "Search for third-party drivers" unchecked and continue with Done.
Choose the type of installation
4.4 Network configuration
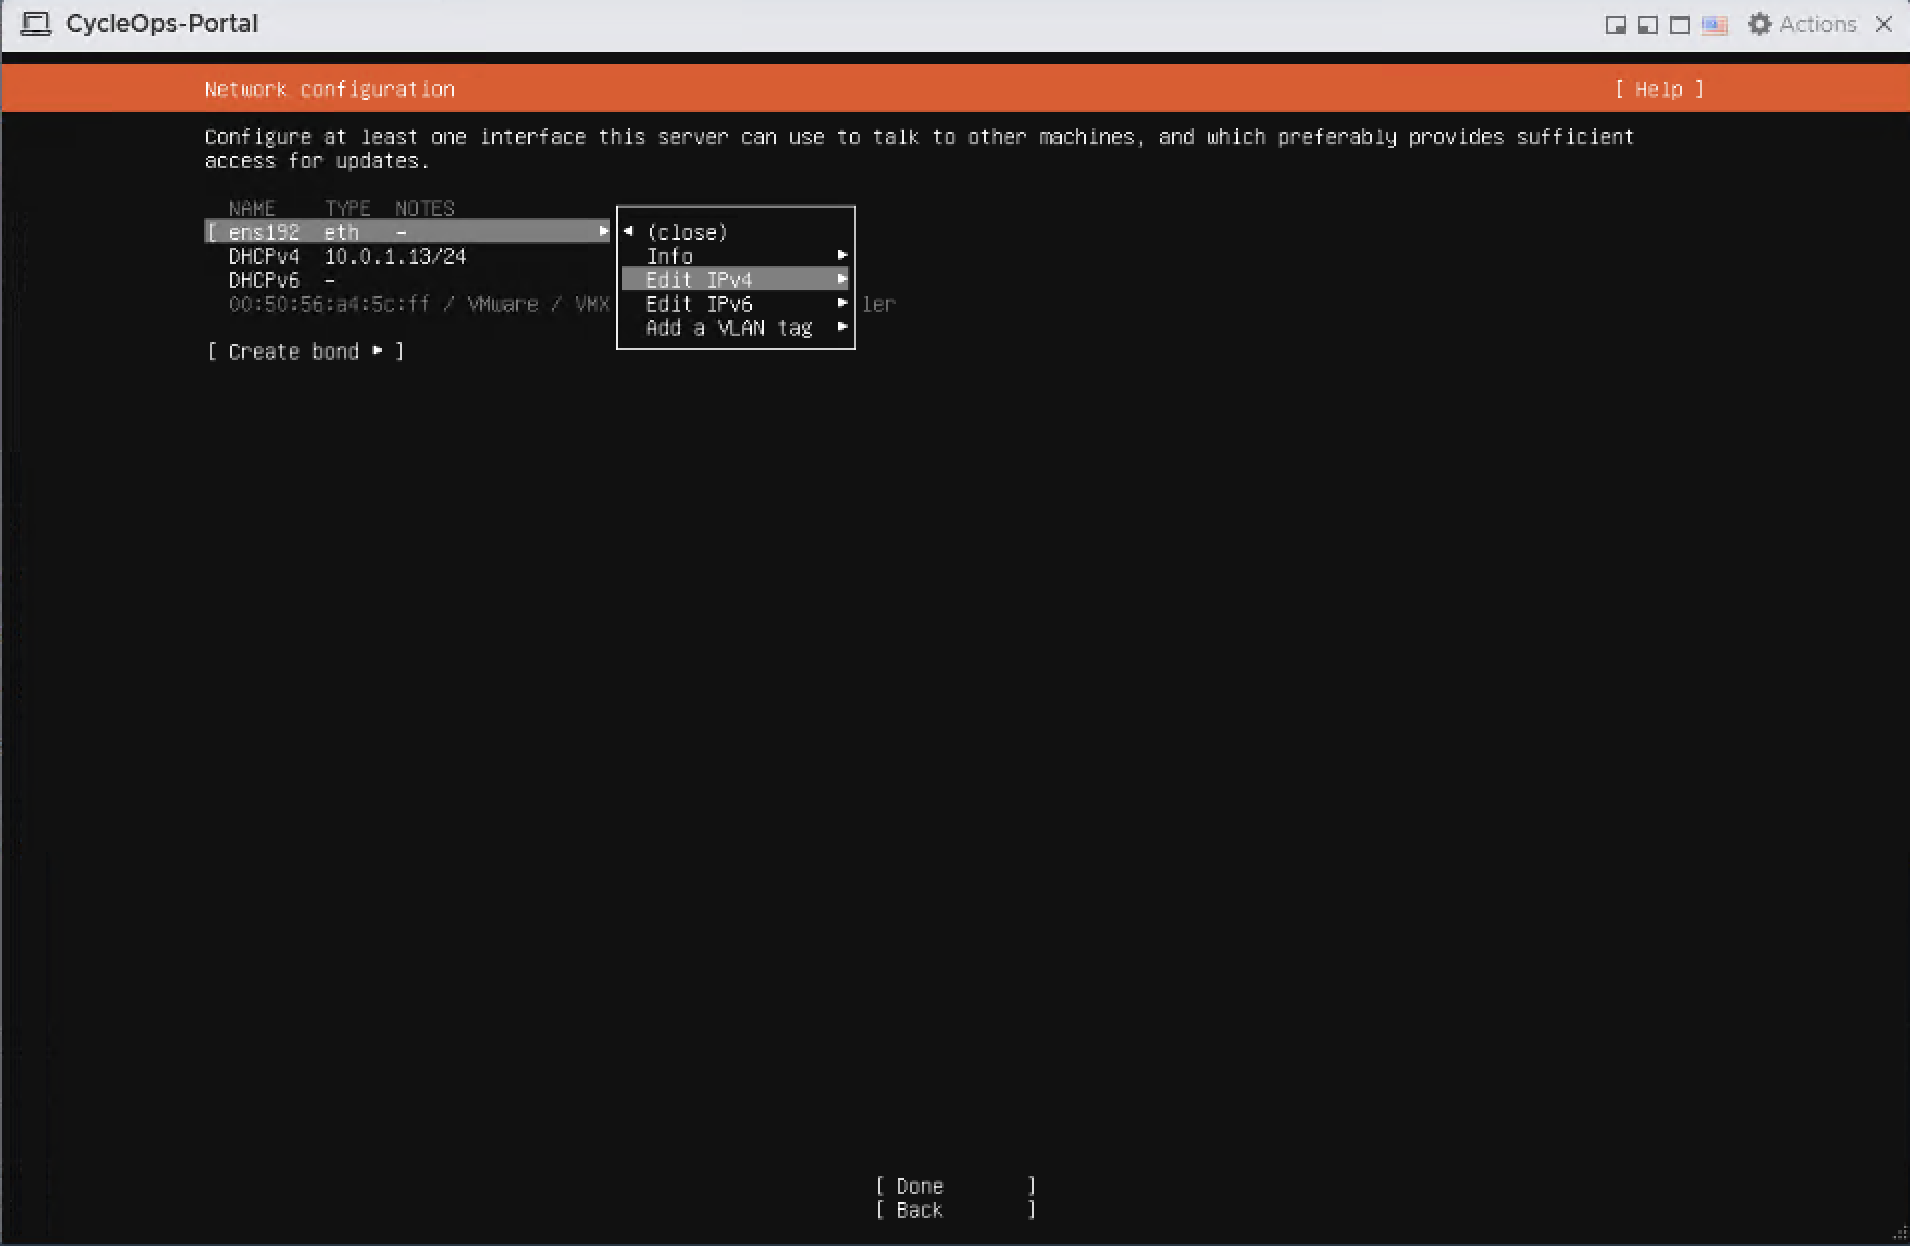
On the Network configuration page, highlight the ens192 interface, press Enter, and select Edit IPv4.
Edit IPv4 on the ens192 interface
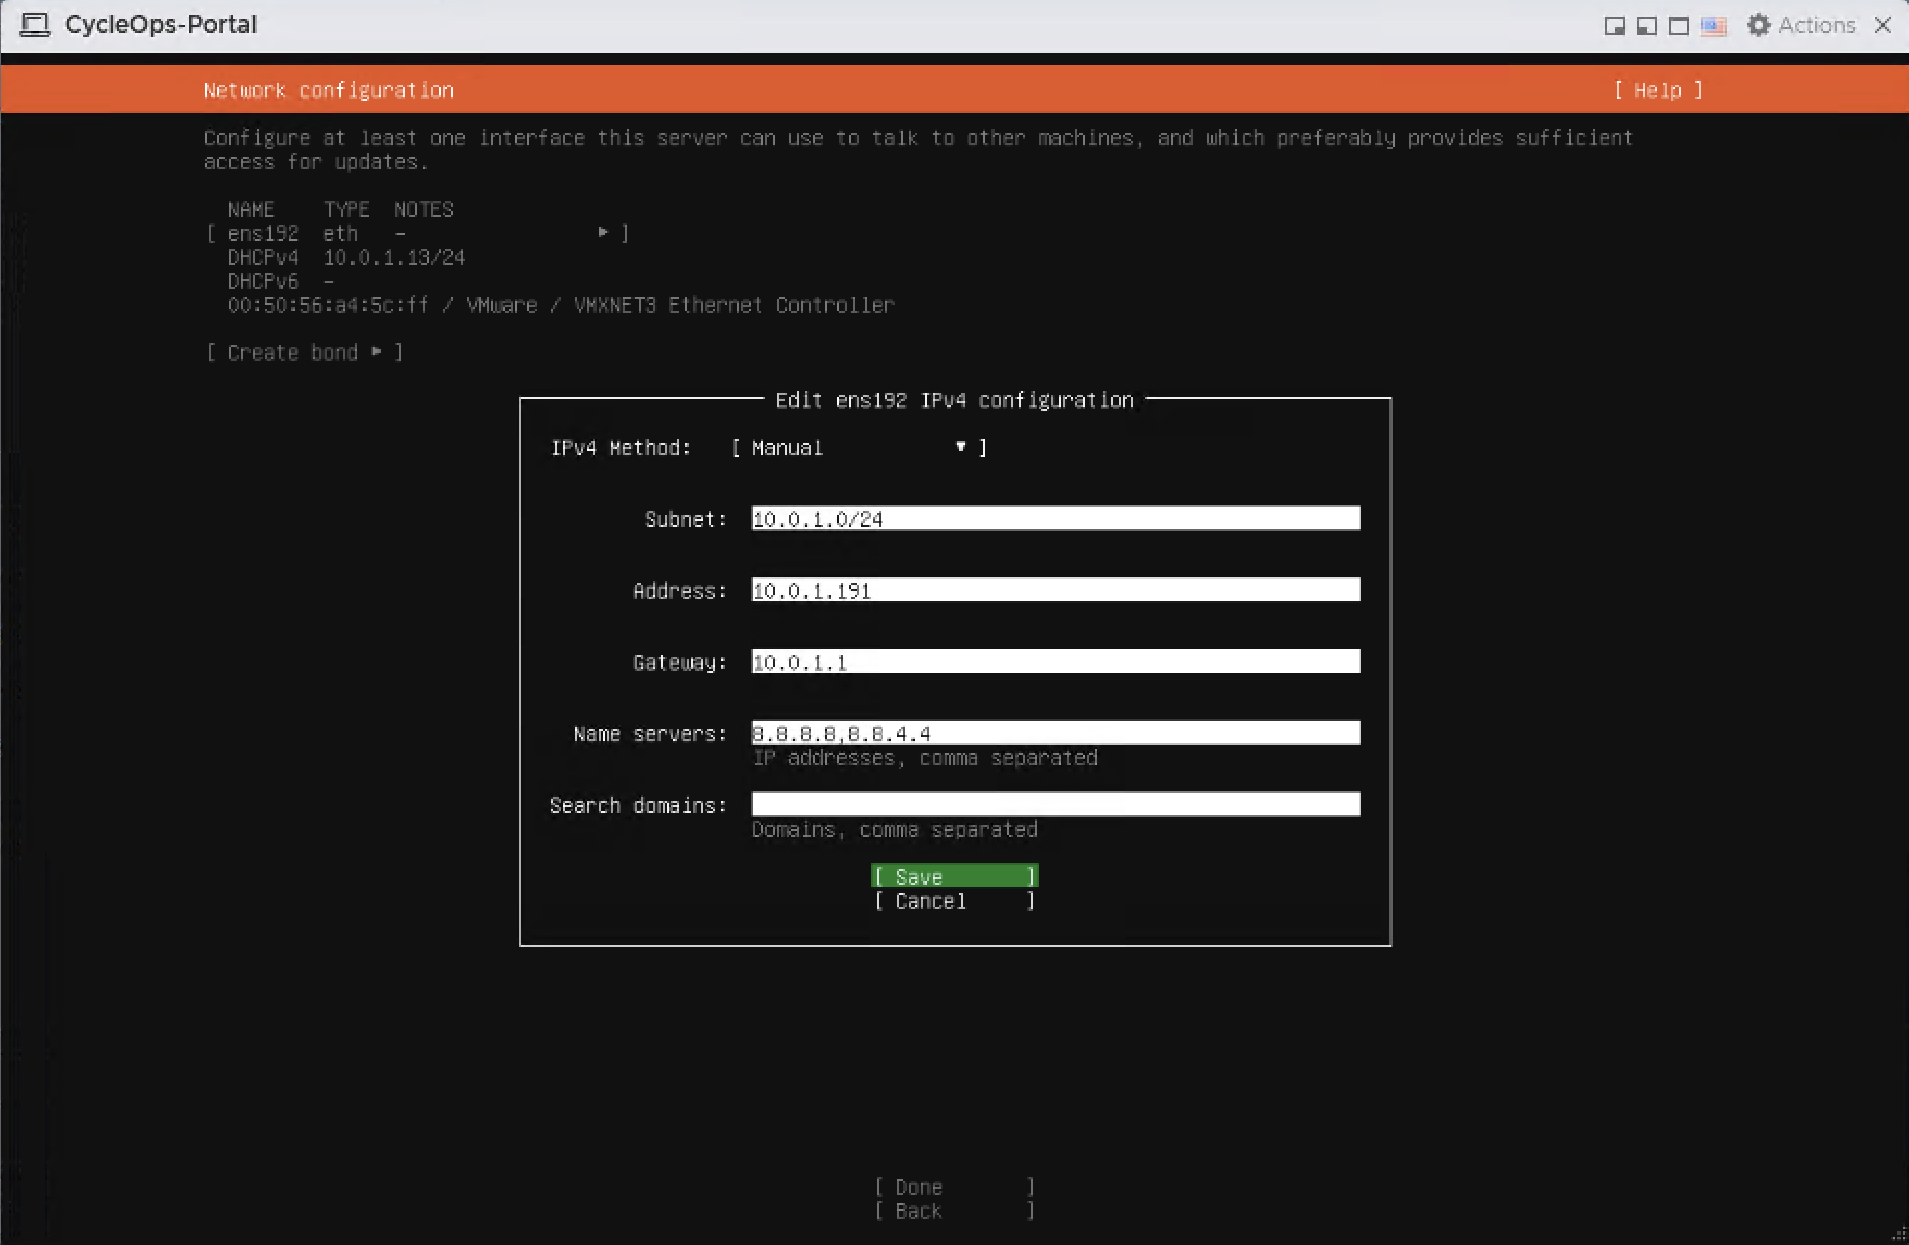
Select Manual as the IPv4 Method. Fill in Subnet, Address, Gateway, and Name servers with your network values, separate DNS addresses with commas, and select Save.
Static IPv4 values
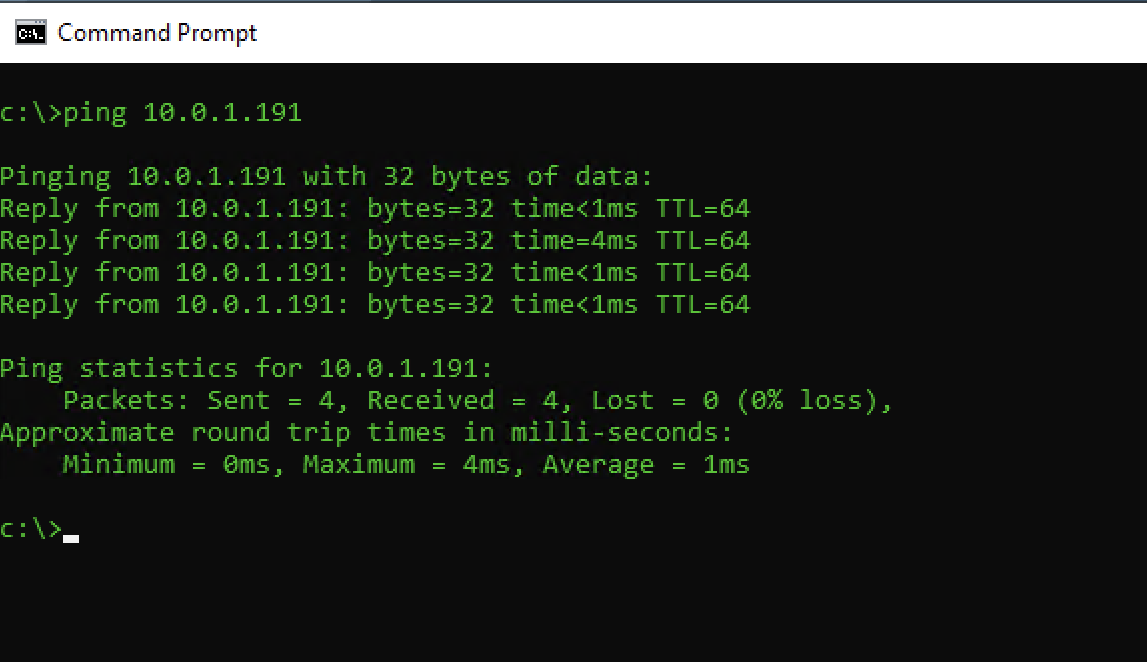
After saving, confirm reachability by pinging the server address from another computer on the network.
Successful ping to the server address
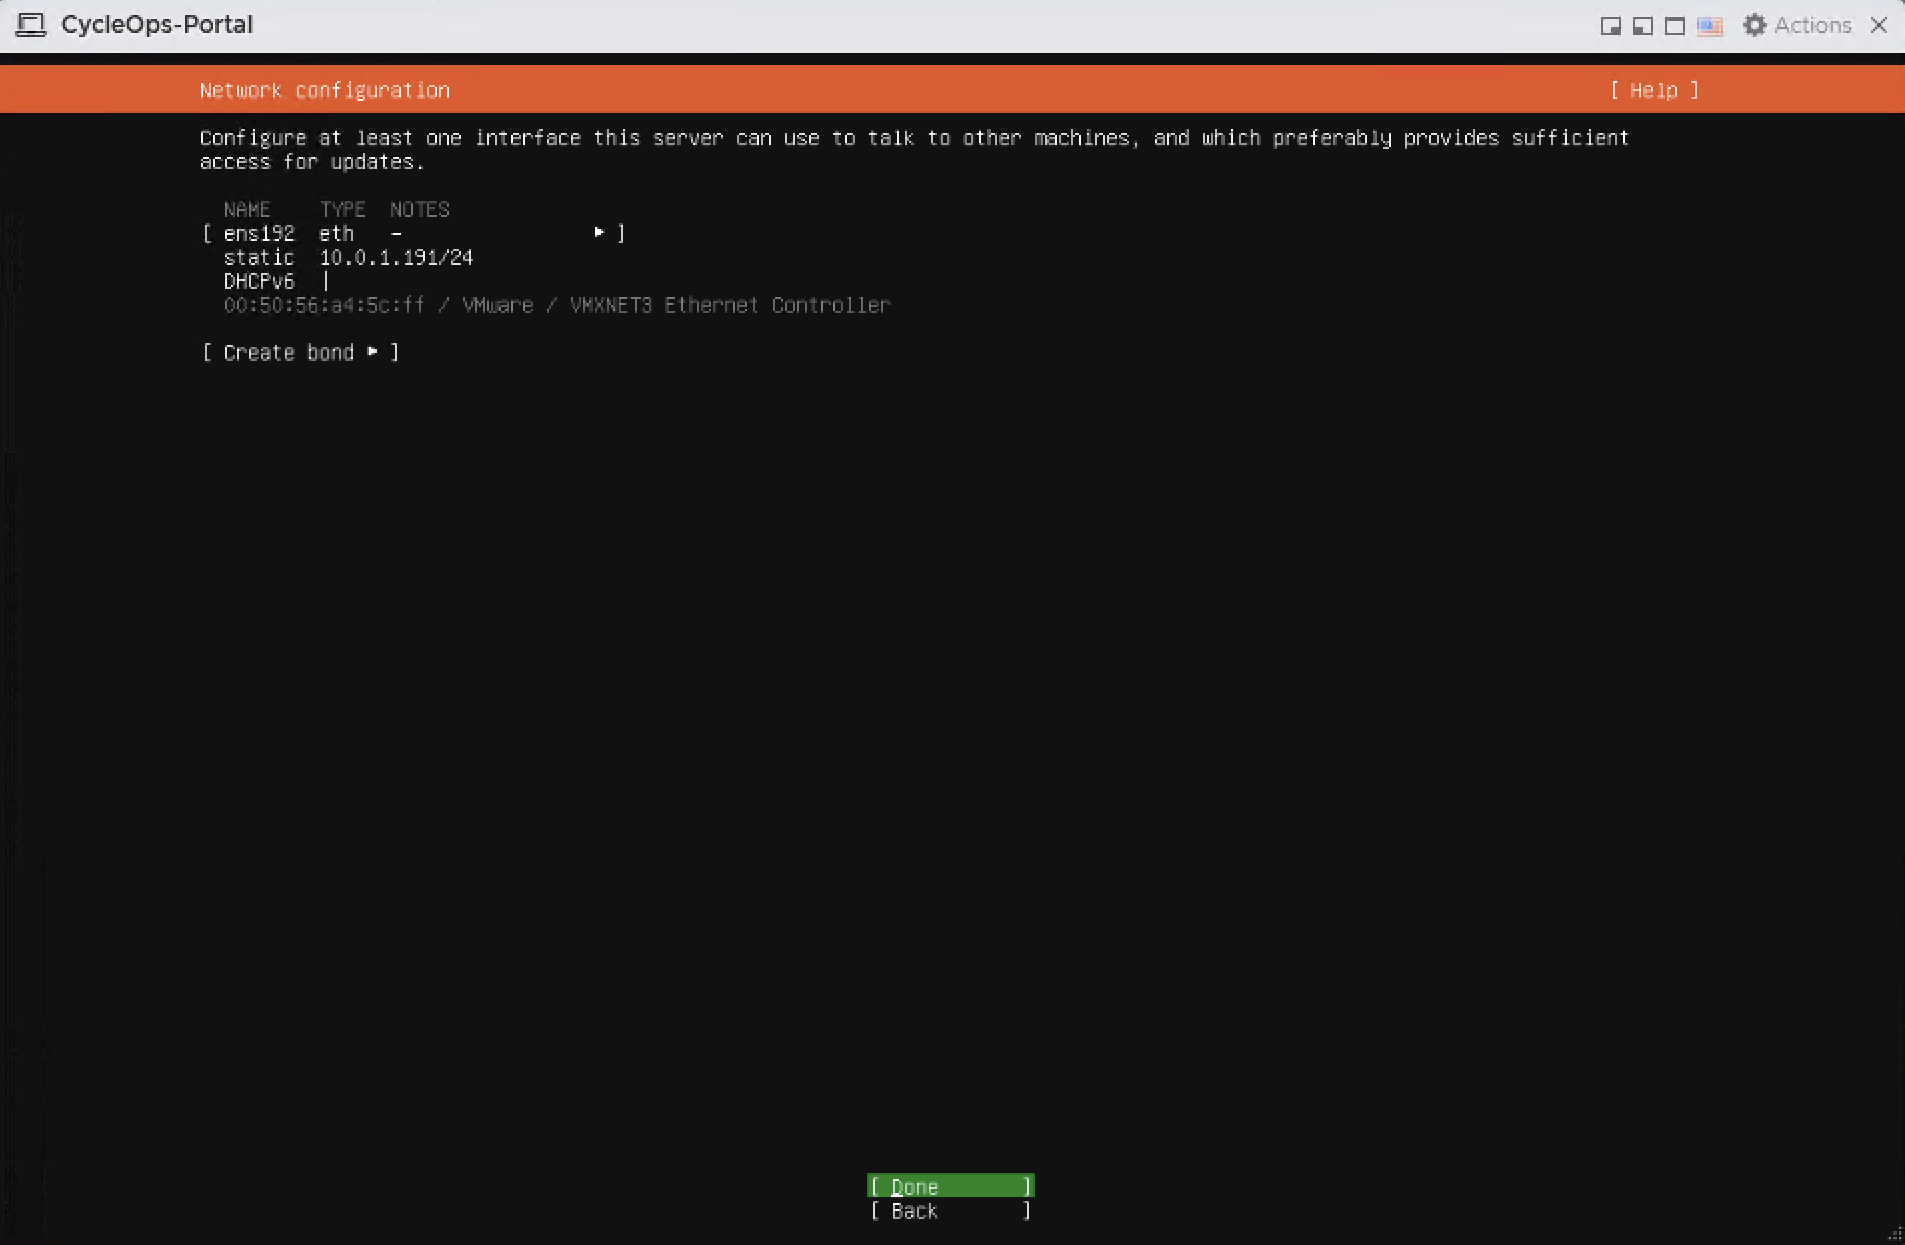
When the interface row shows static and the address you assigned, continue with Done.
ens192 with the static address assigned
4.5 Proxy and package mirror
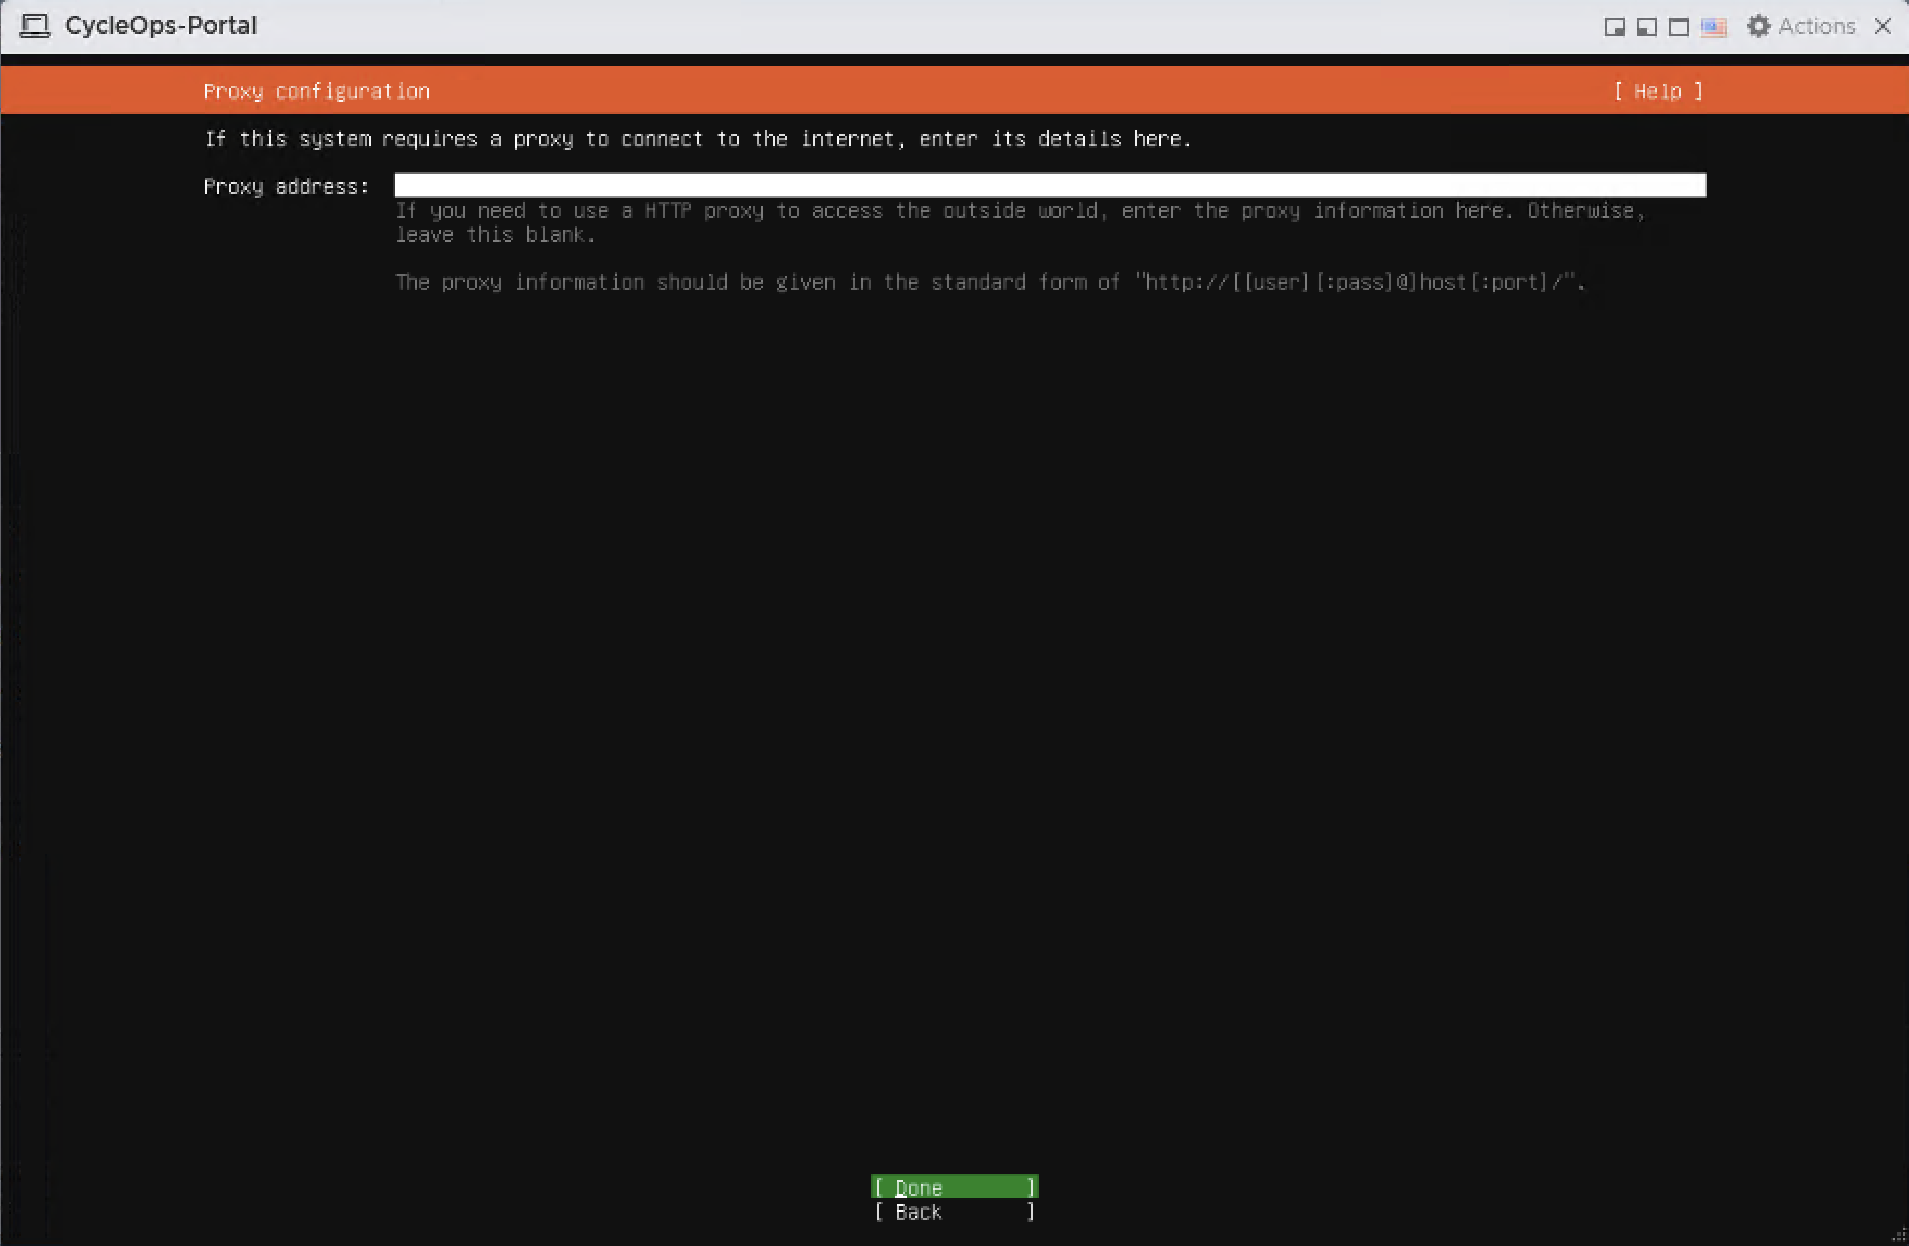
If the server reaches the internet through a proxy, enter it as http://host:port. Otherwise leave the field empty and continue with Done.
Proxy configuration
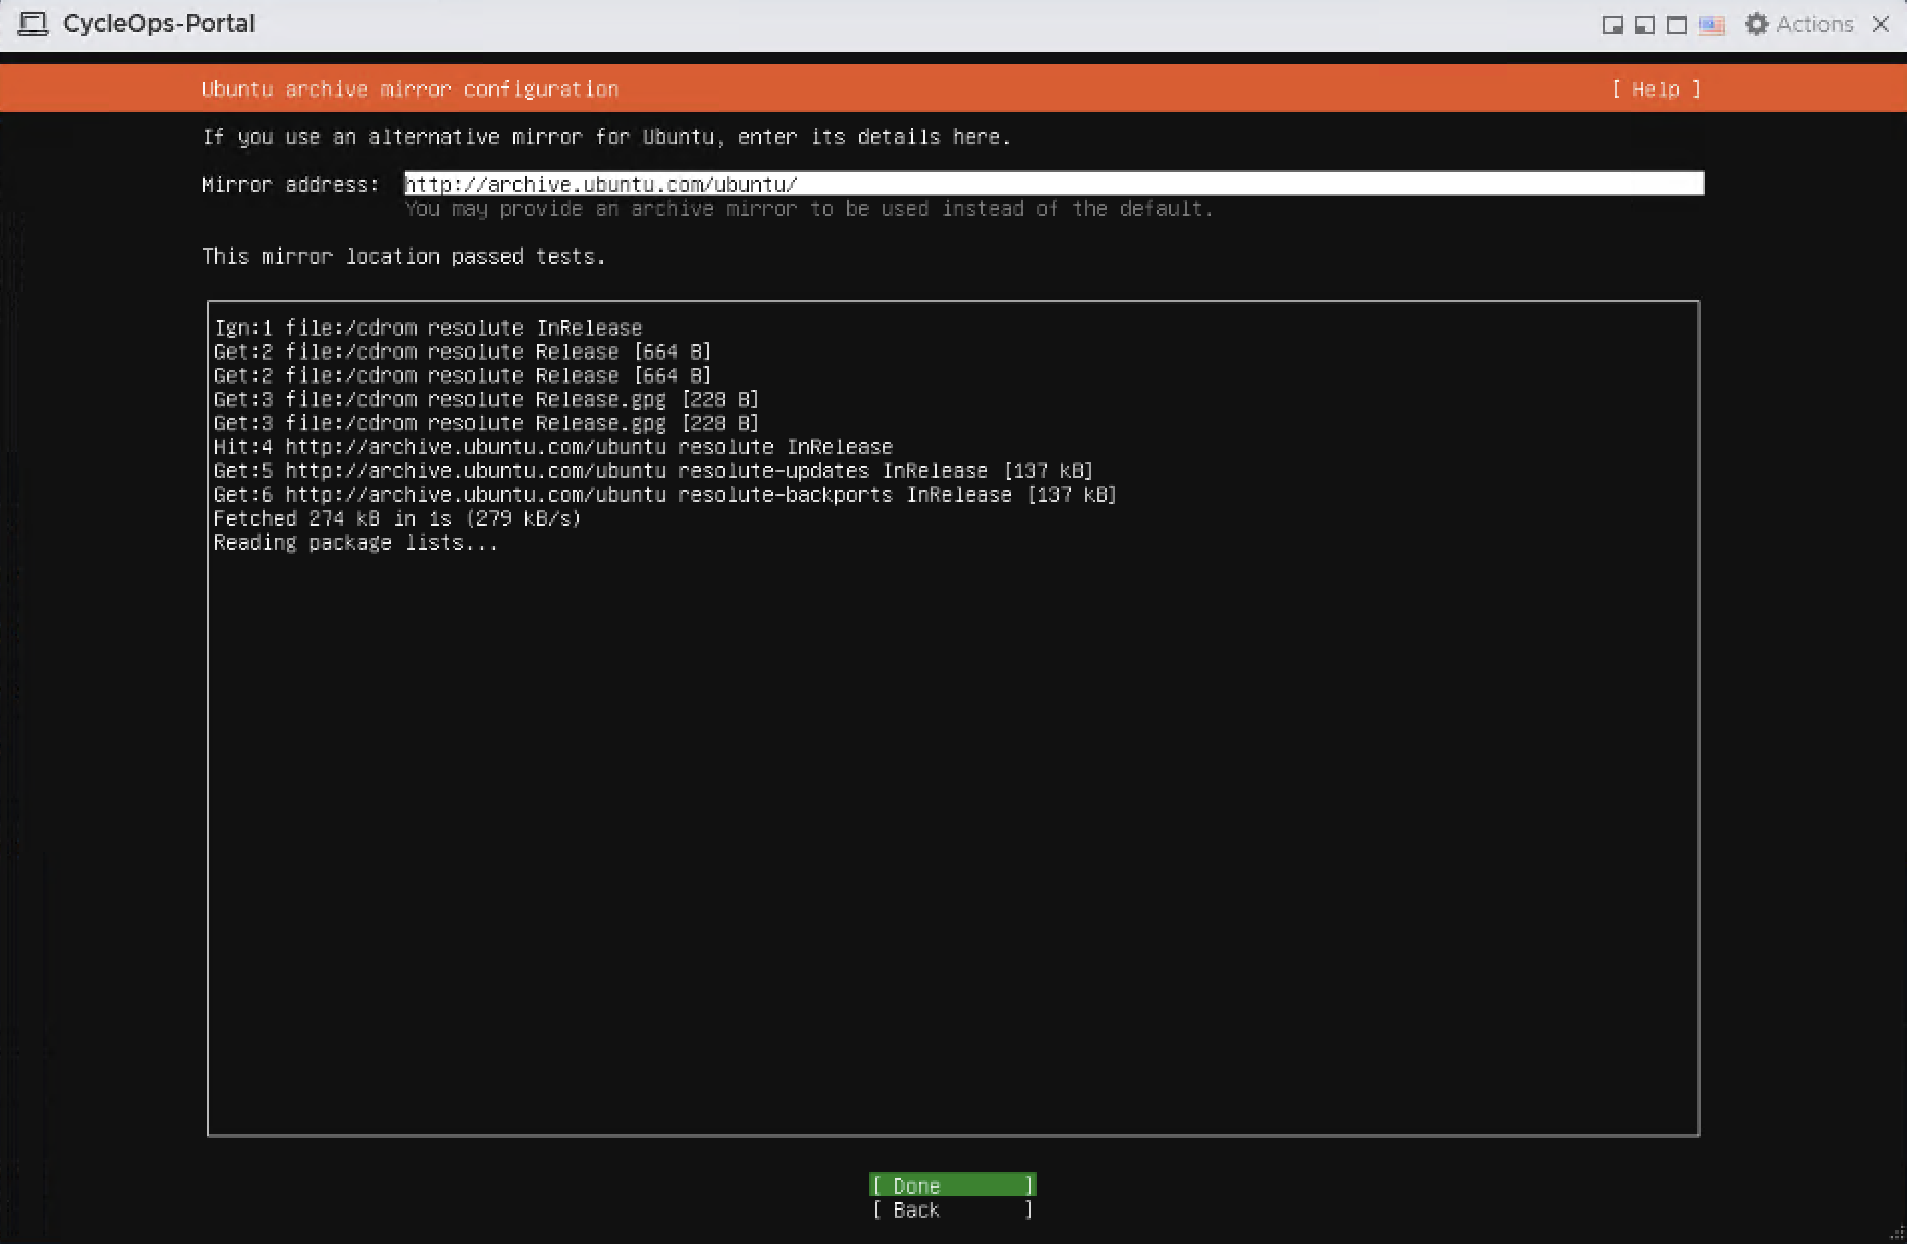
Leave the mirror address at http://archive.ubuntu.com/ubuntu/. When "This mirror location passed tests." appears, continue with Done.
Ubuntu archive mirror configuration
4.6 Select the storage layout
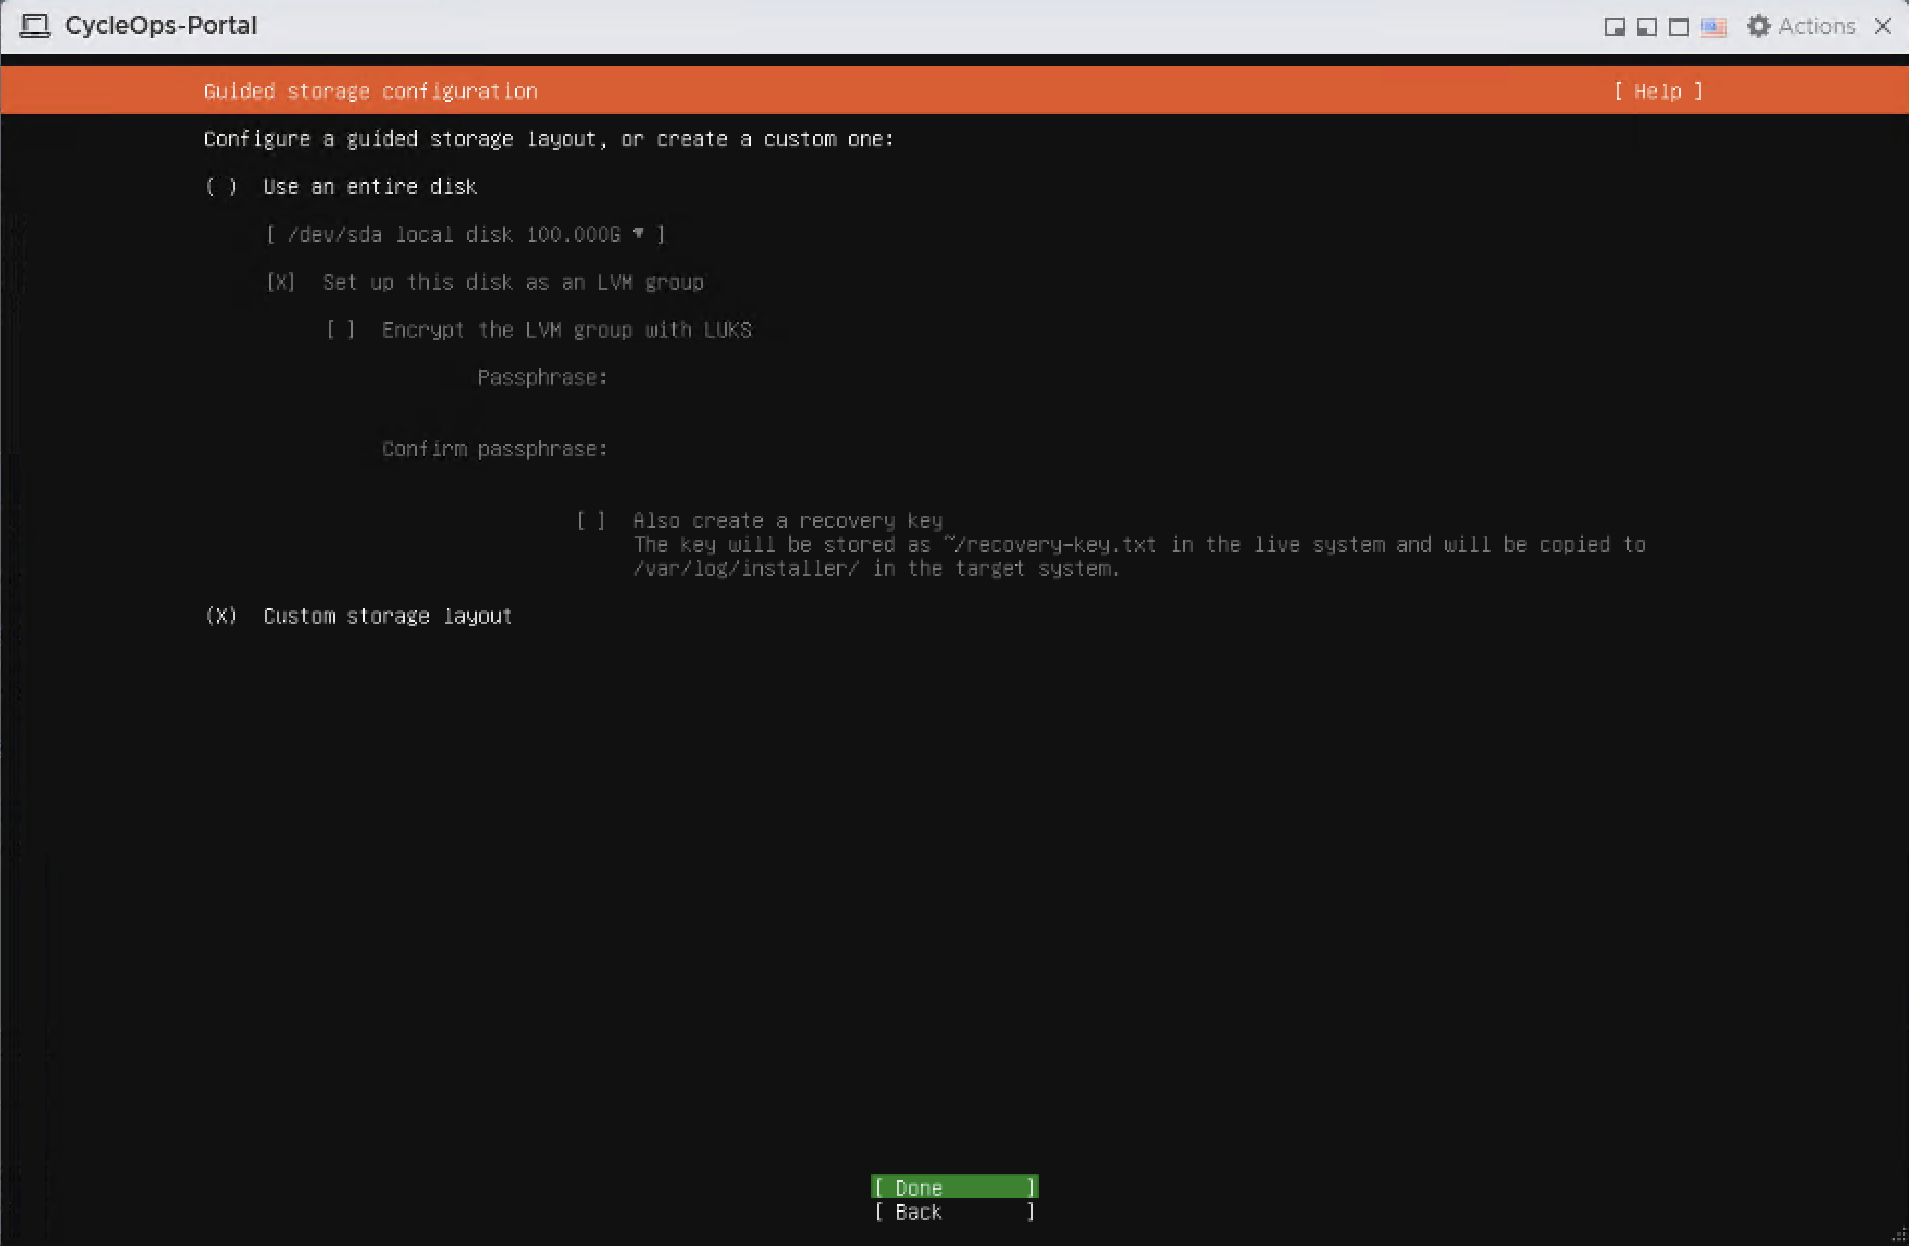
On the Guided storage configuration page, select Custom storage layout and continue with Done.
Custom storage layout selected
4.7 Create the swap partition
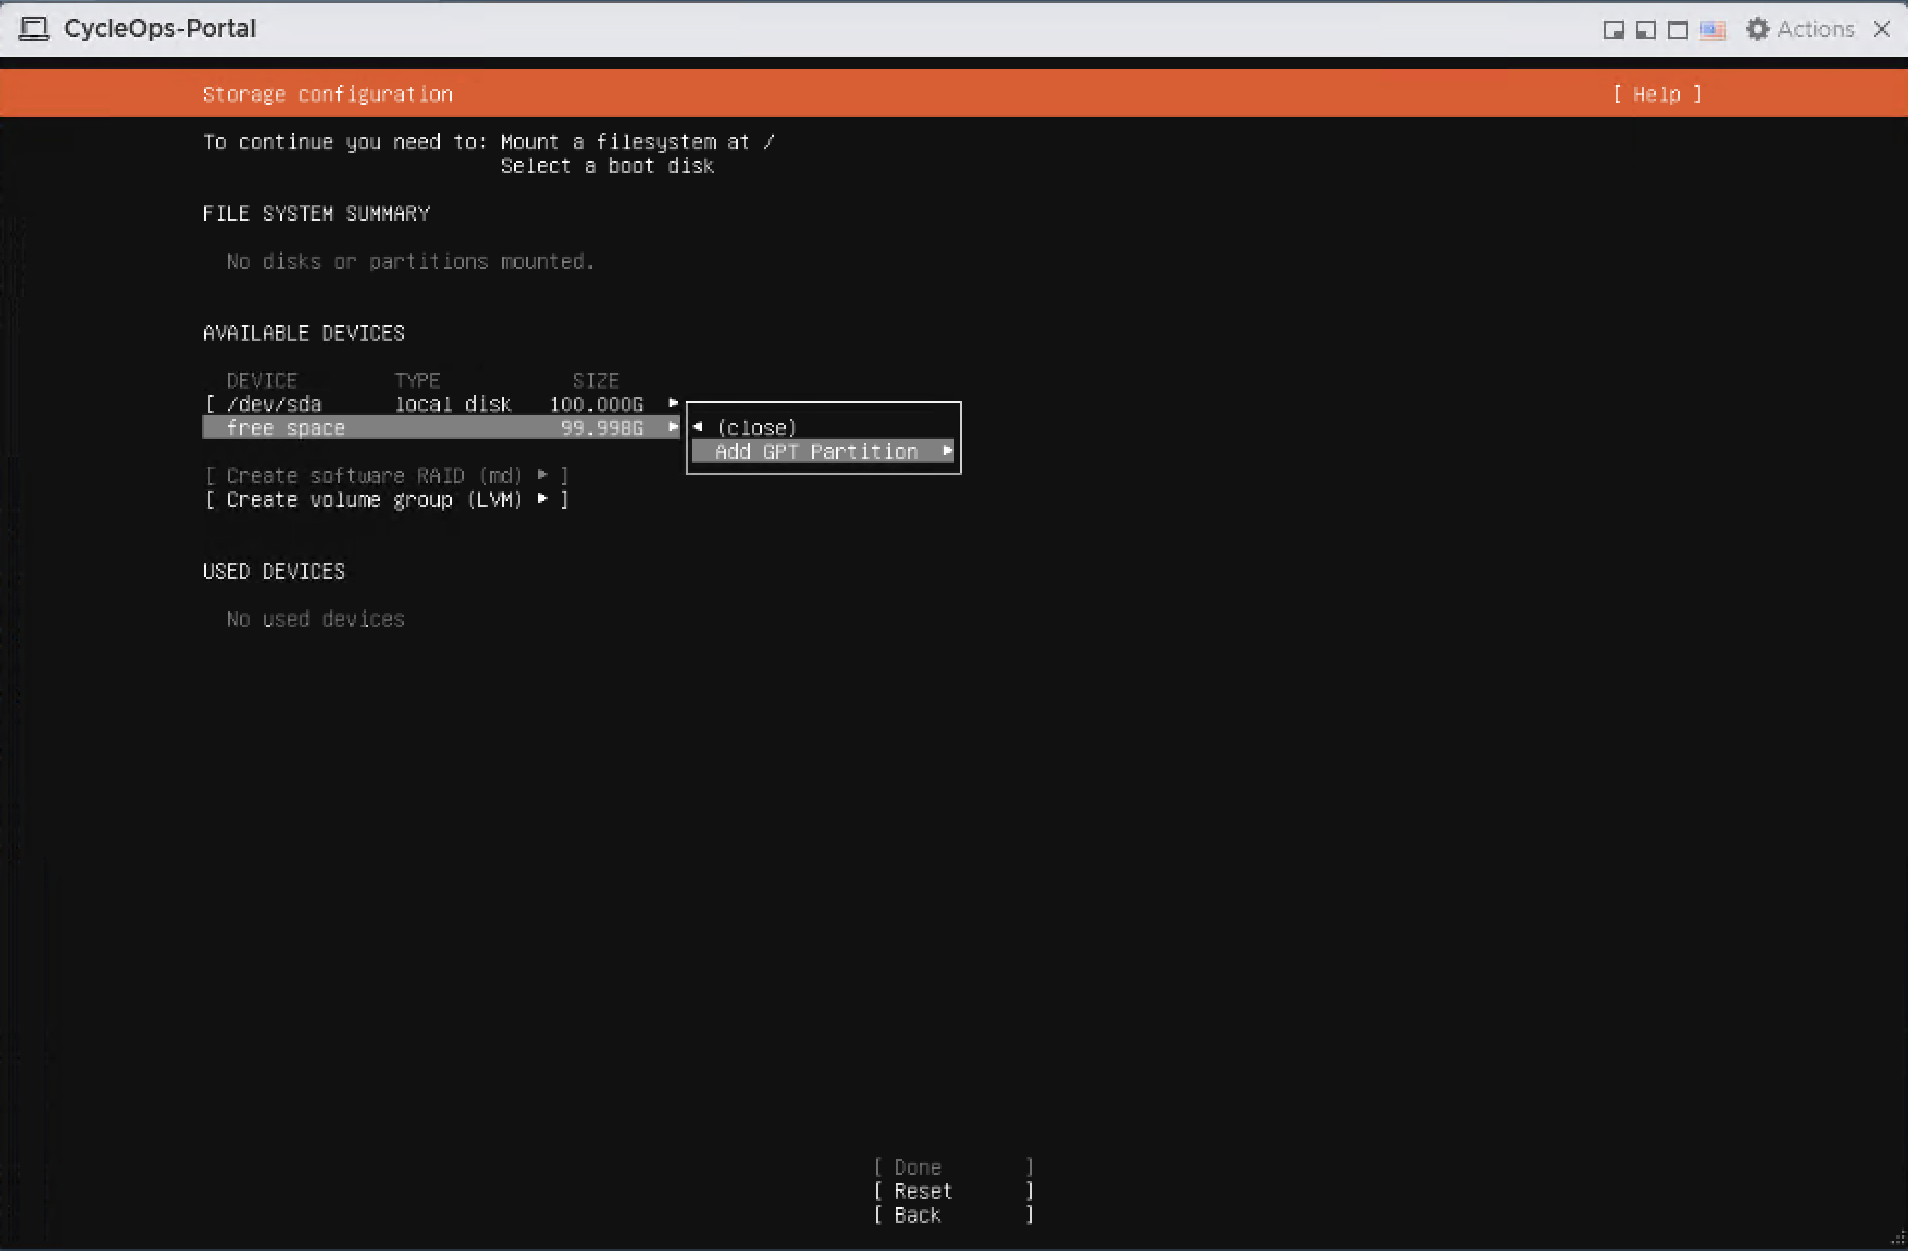
Under AVAILABLE DEVICES, highlight free space, press Enter, and select Add GPT Partition.
Add GPT Partition on free space
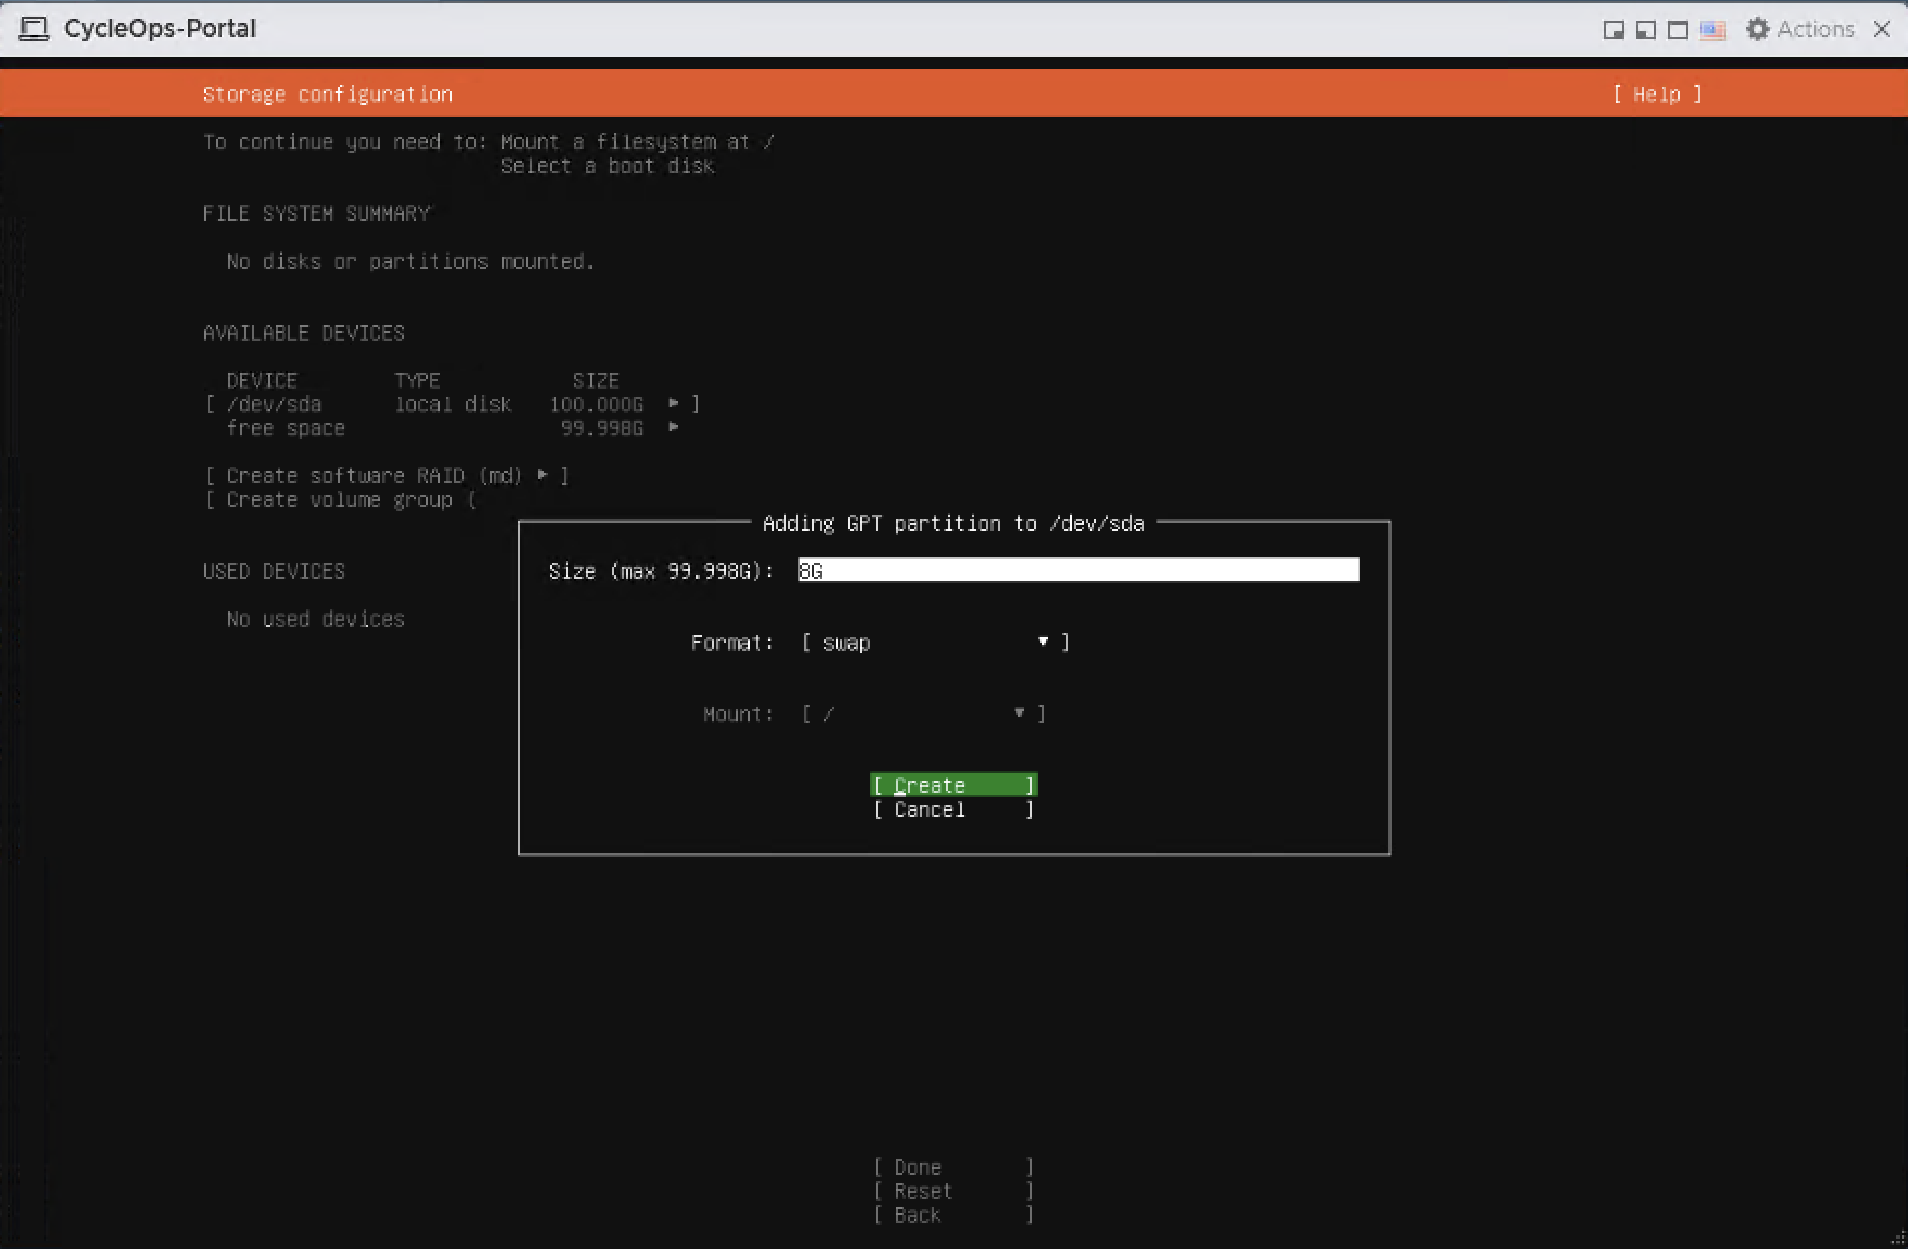
Enter 8G as the size, select swap as the format, and select Create.
Creating the 8G swap partition
4.8 Create the root partition
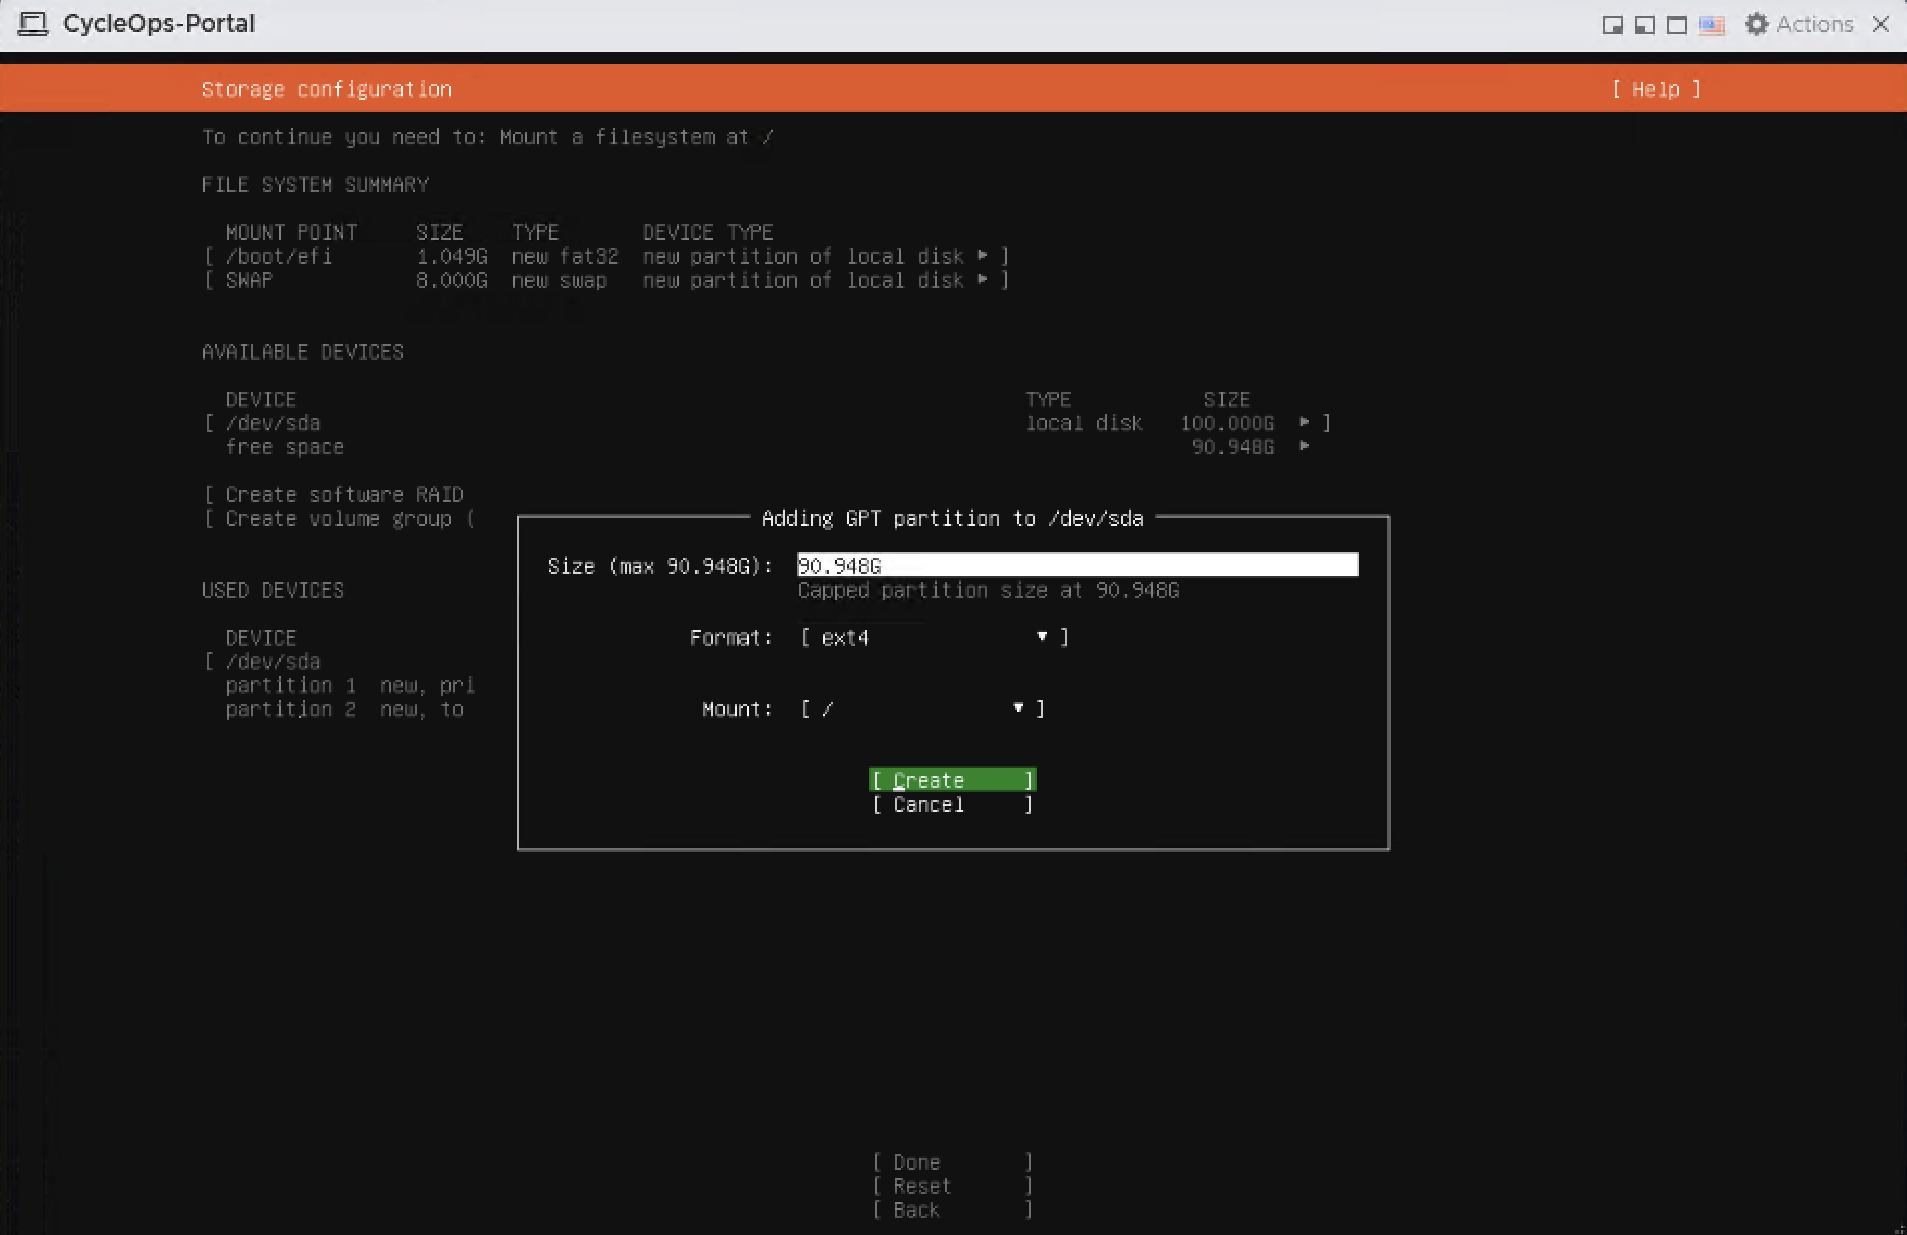
Select Add GPT Partition on free space again. Keep the size at all remaining space, select ext4 as the format and / as the mount point, then select Create.
Creating the ext4 root partition with the remaining space
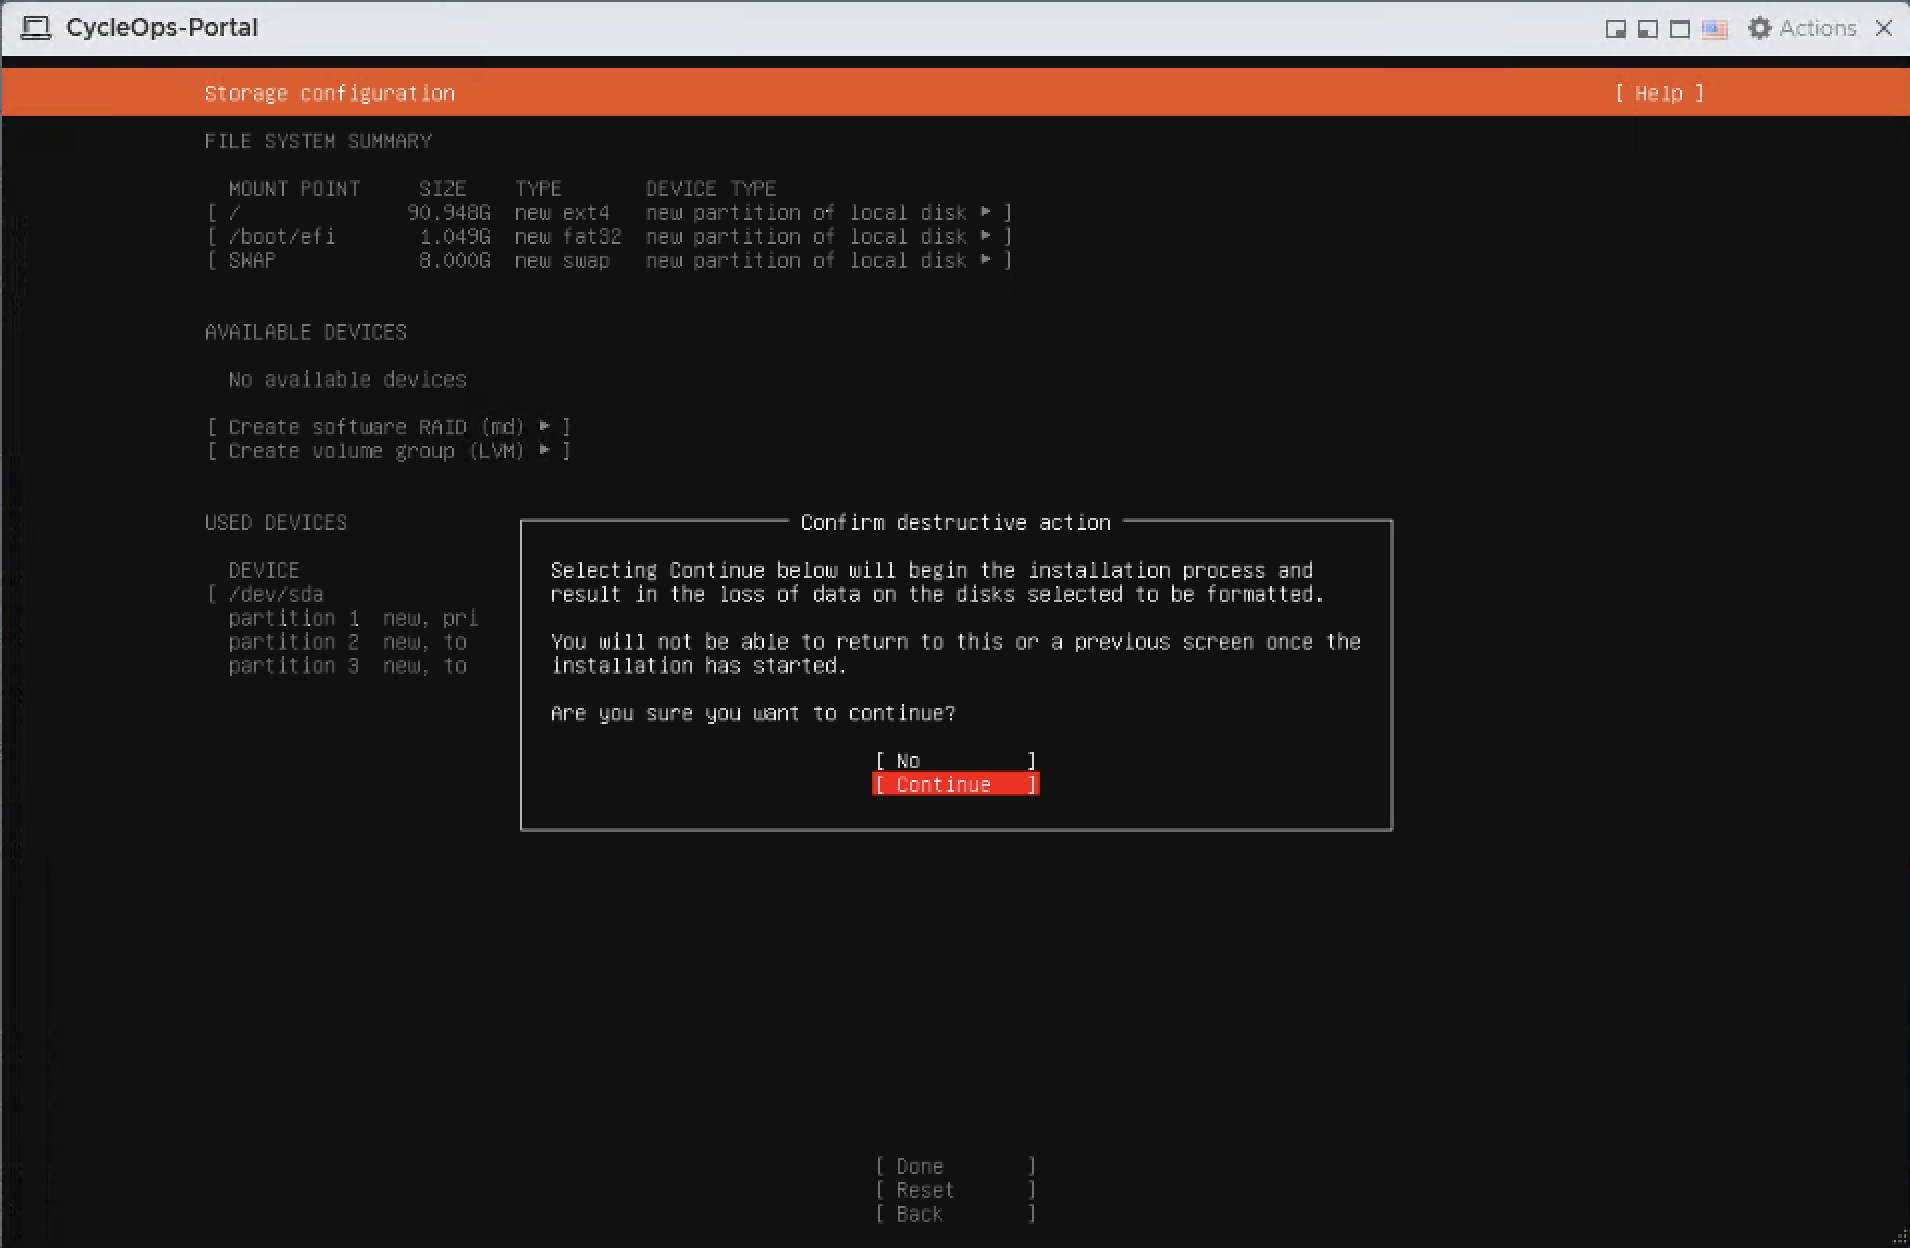
When FILE SYSTEM SUMMARY lists / (ext4), /boot/efi, and SWAP (8G), continue with Done.
Selecting Continue in the Confirm destructive action dialog formats the disk. You cannot return to earlier pages after this point.
Partition summary and the Confirm destructive action dialog
4.9 User and server name
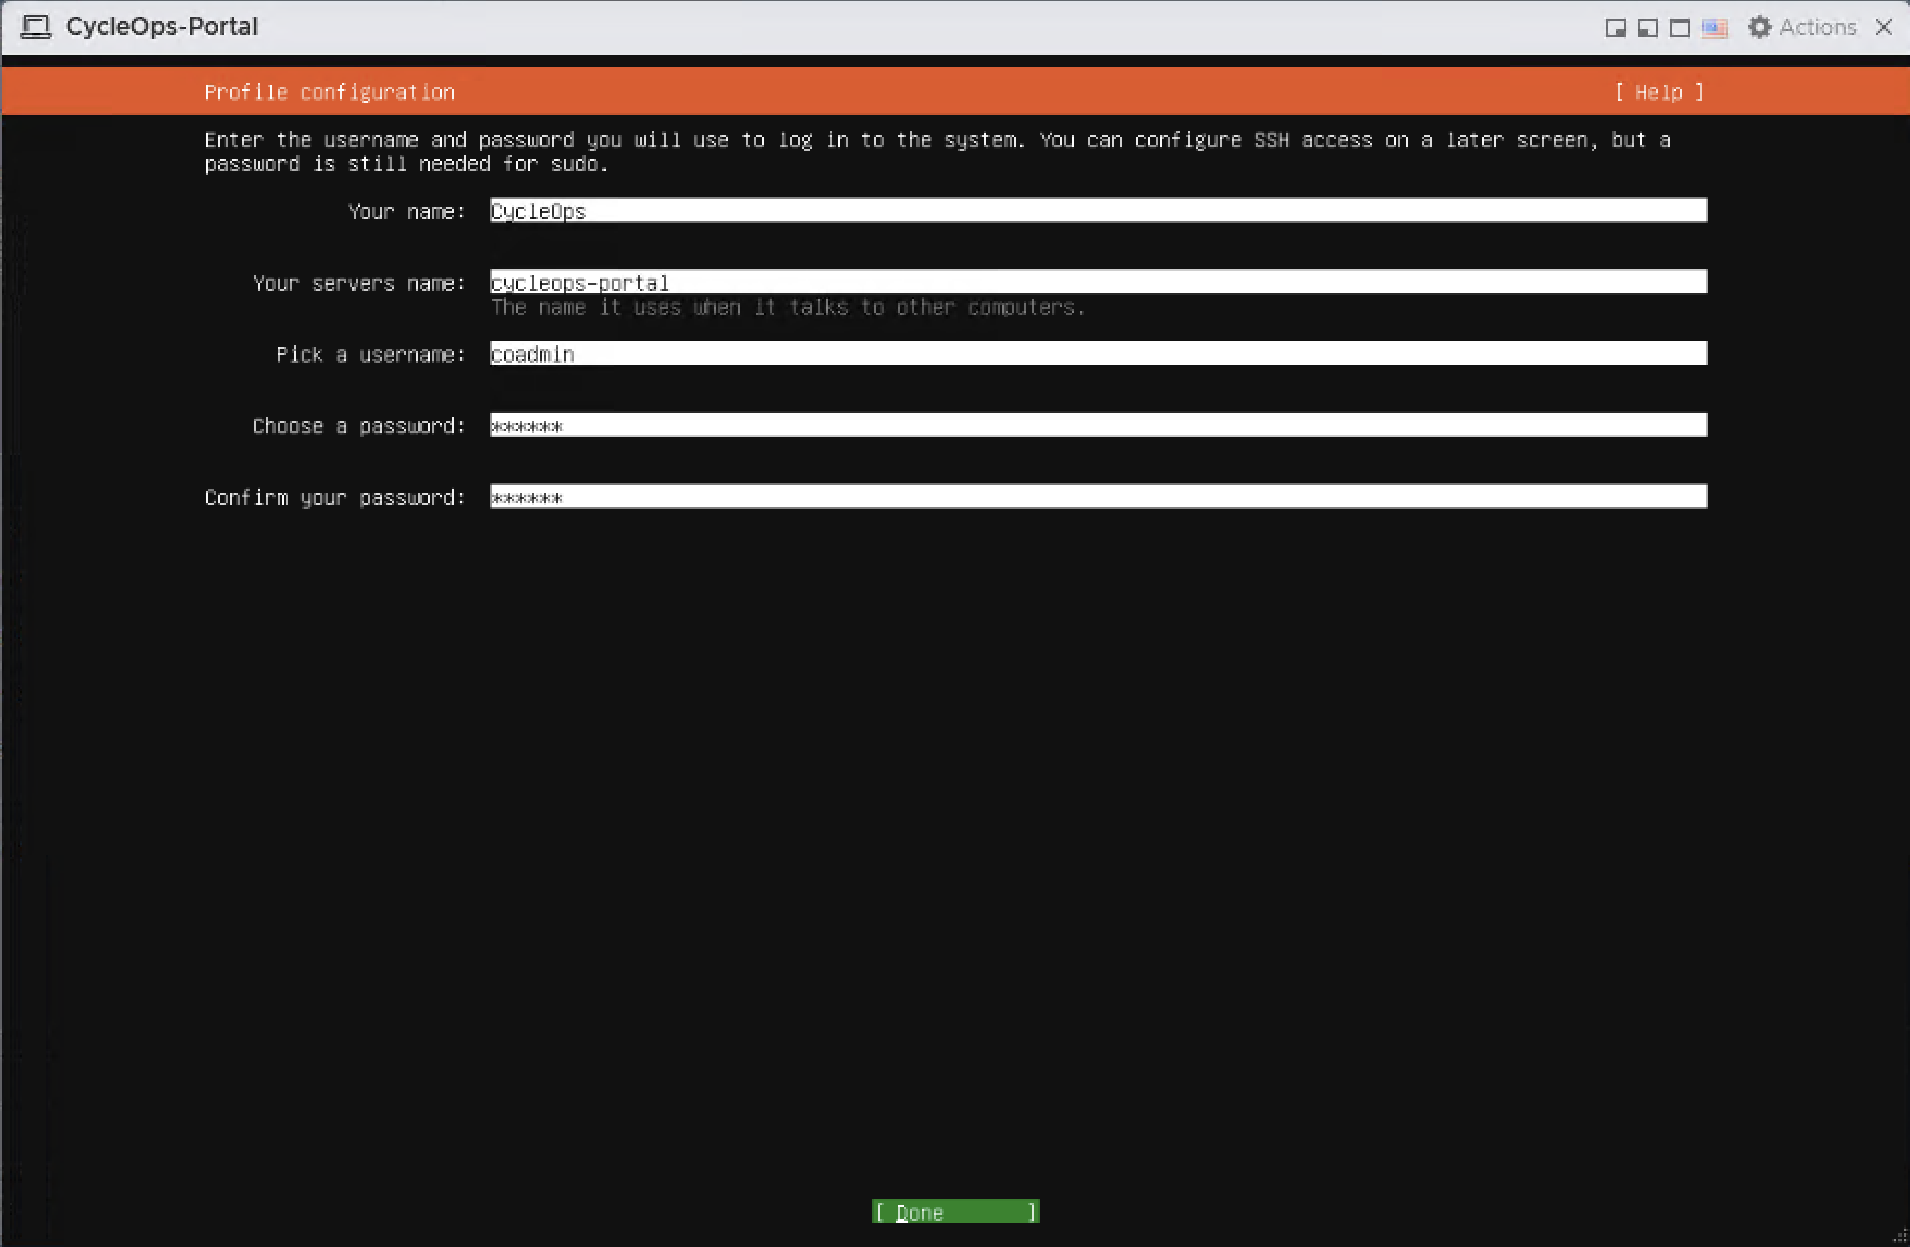
Enter CycleOps as your name, cycleops-portal as the server name, and coadmin as the username. Choose a password of at least 12 characters with upper and lower case letters, digits, and symbols, then continue with Done.
Profile configuration
4.10 Ubuntu Pro, SSH, and snaps
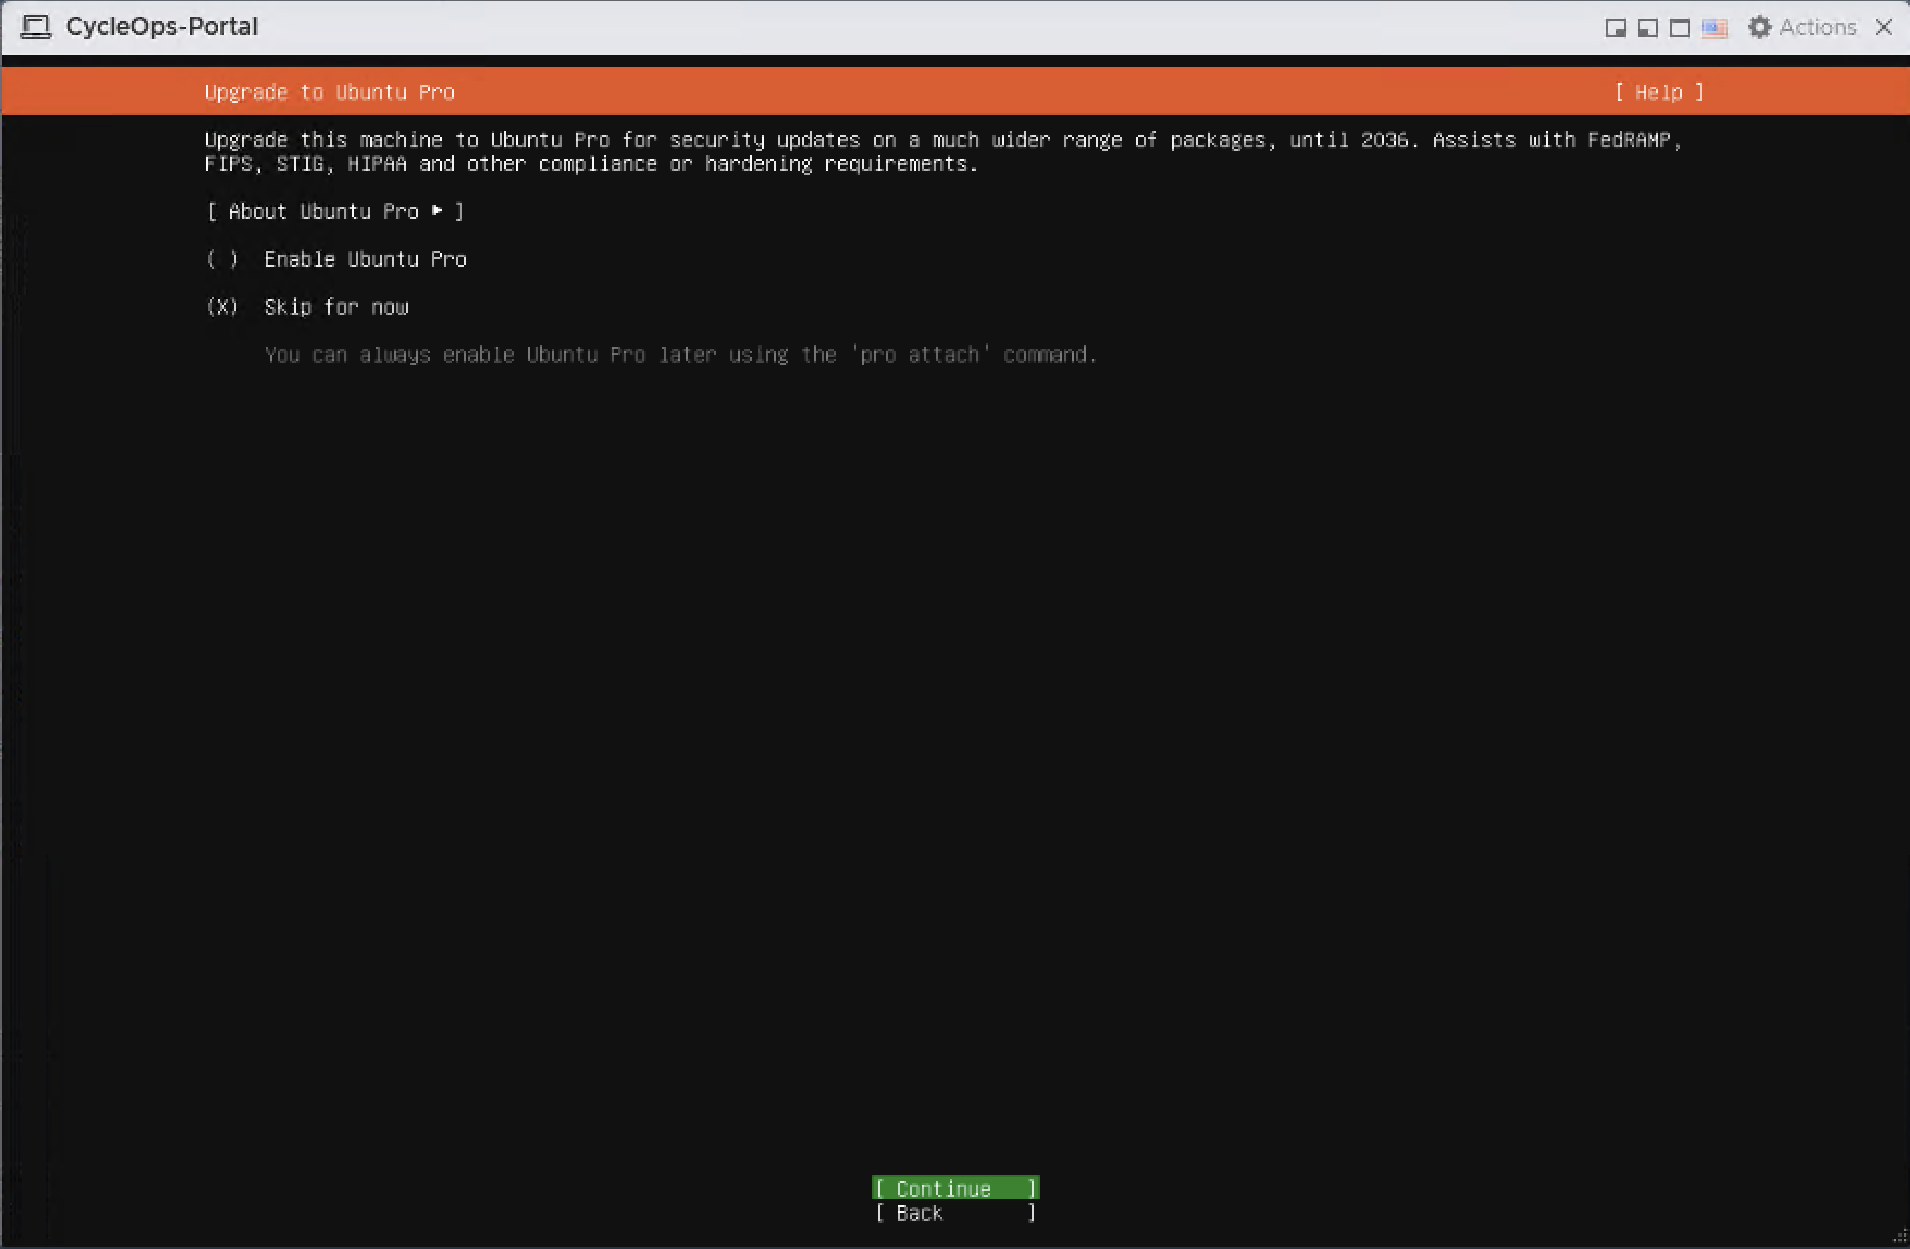
On the Upgrade to Ubuntu Pro page, select Skip for now and Continue.
Upgrade to Ubuntu Pro
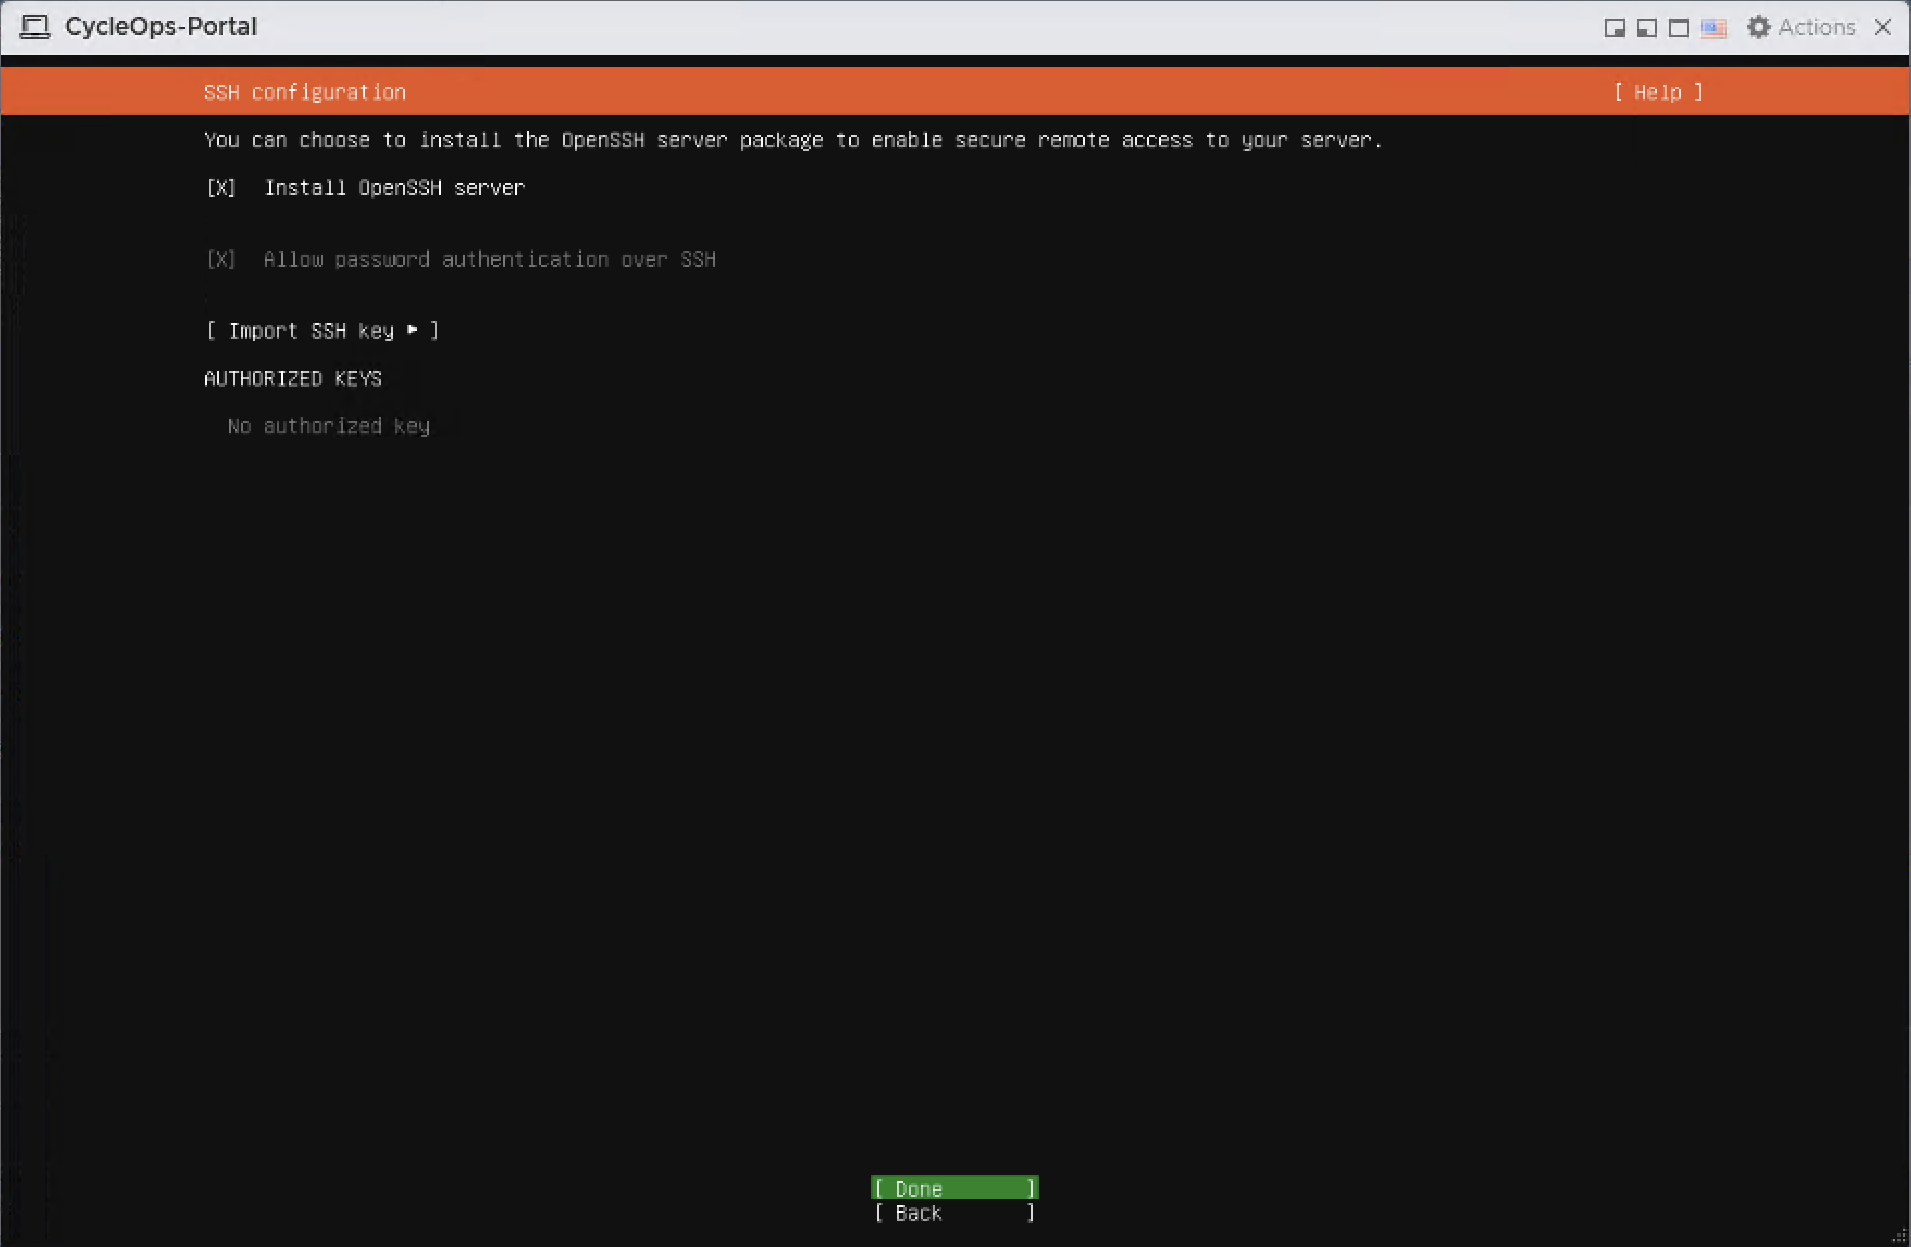
On the SSH configuration page, check Install OpenSSH server and continue with Done.
SSH configuration
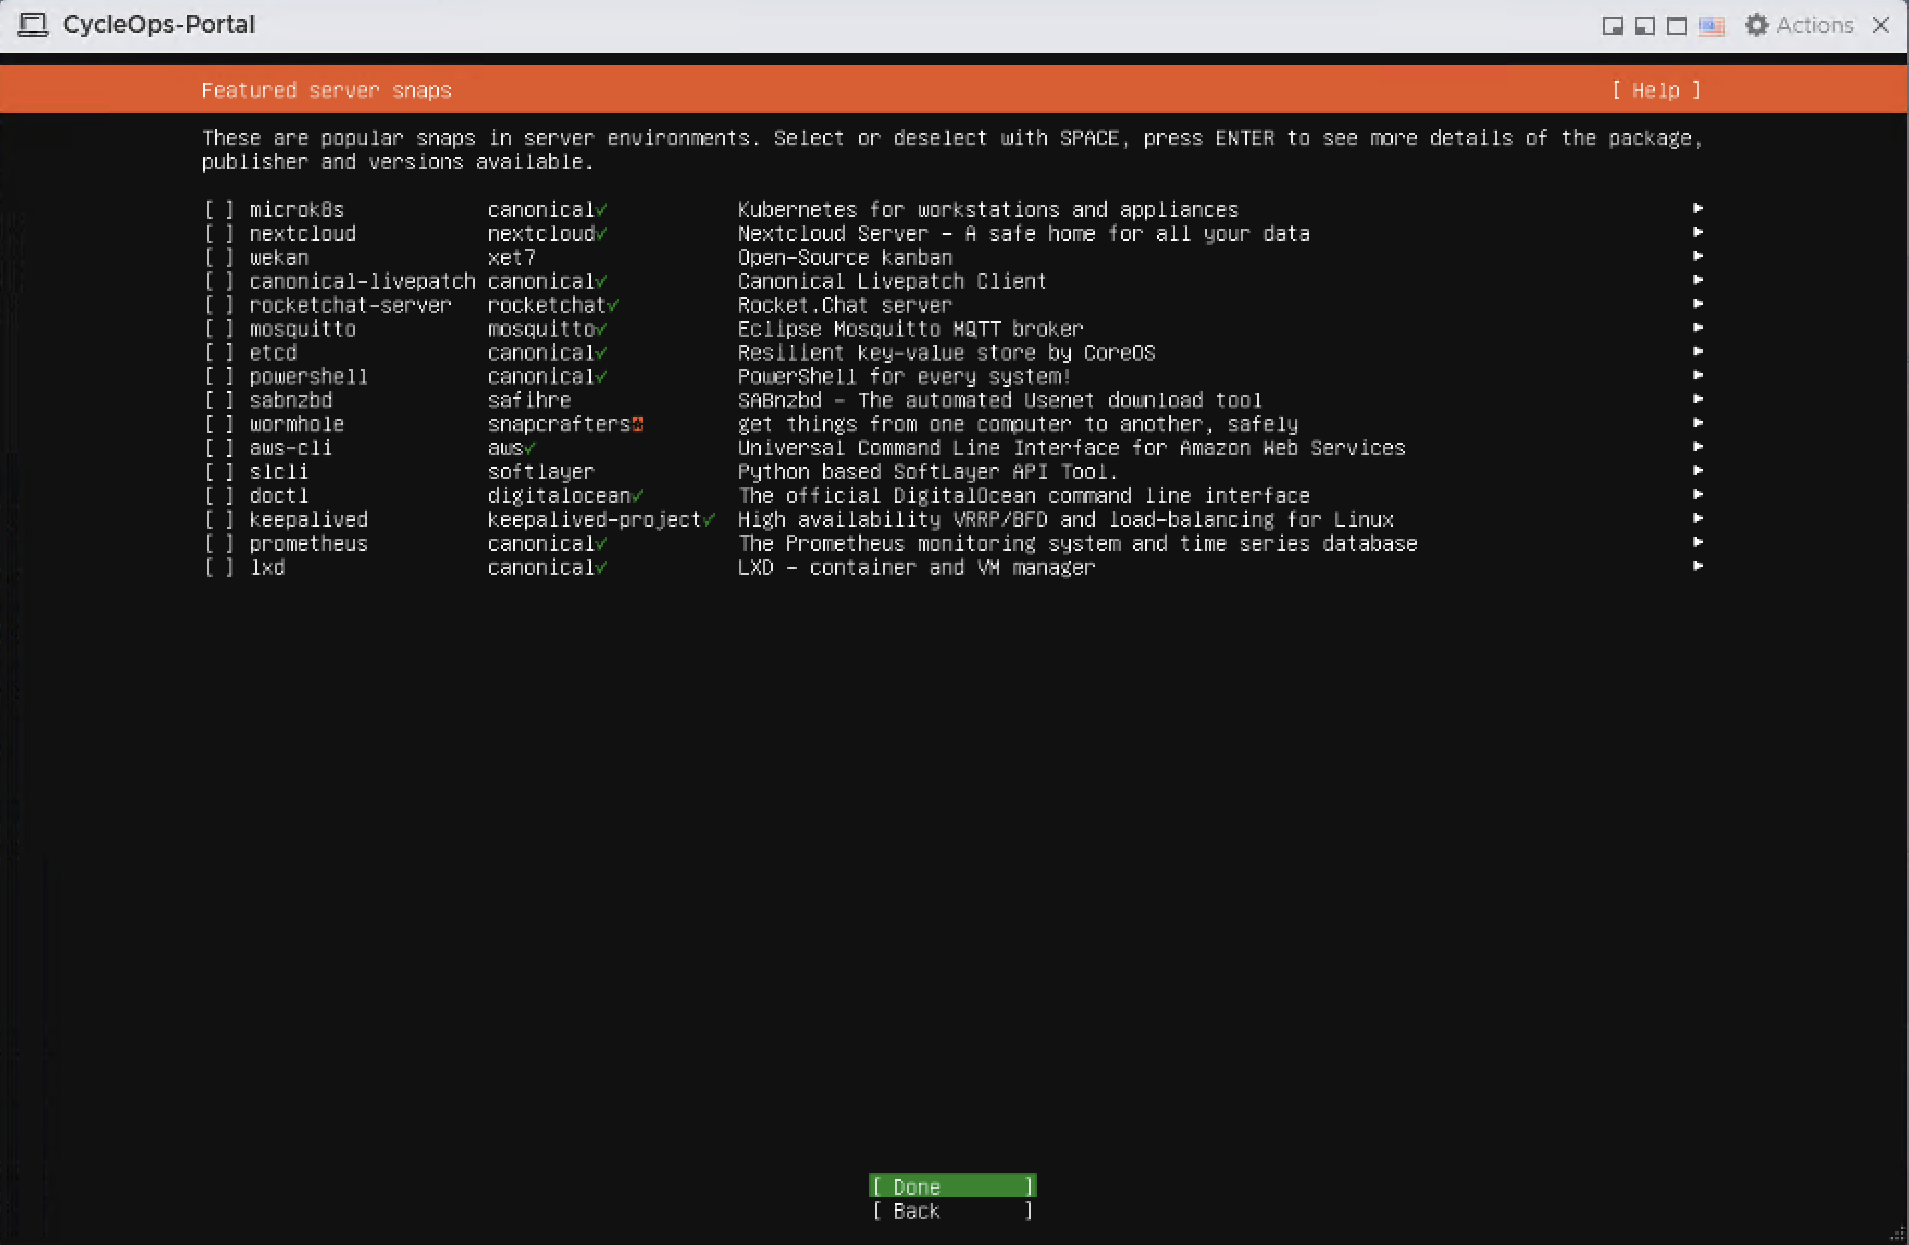
On the Featured server snaps page, continue with Done without selecting anything.
Featured server snaps
4.11 Wait for the installation to finish
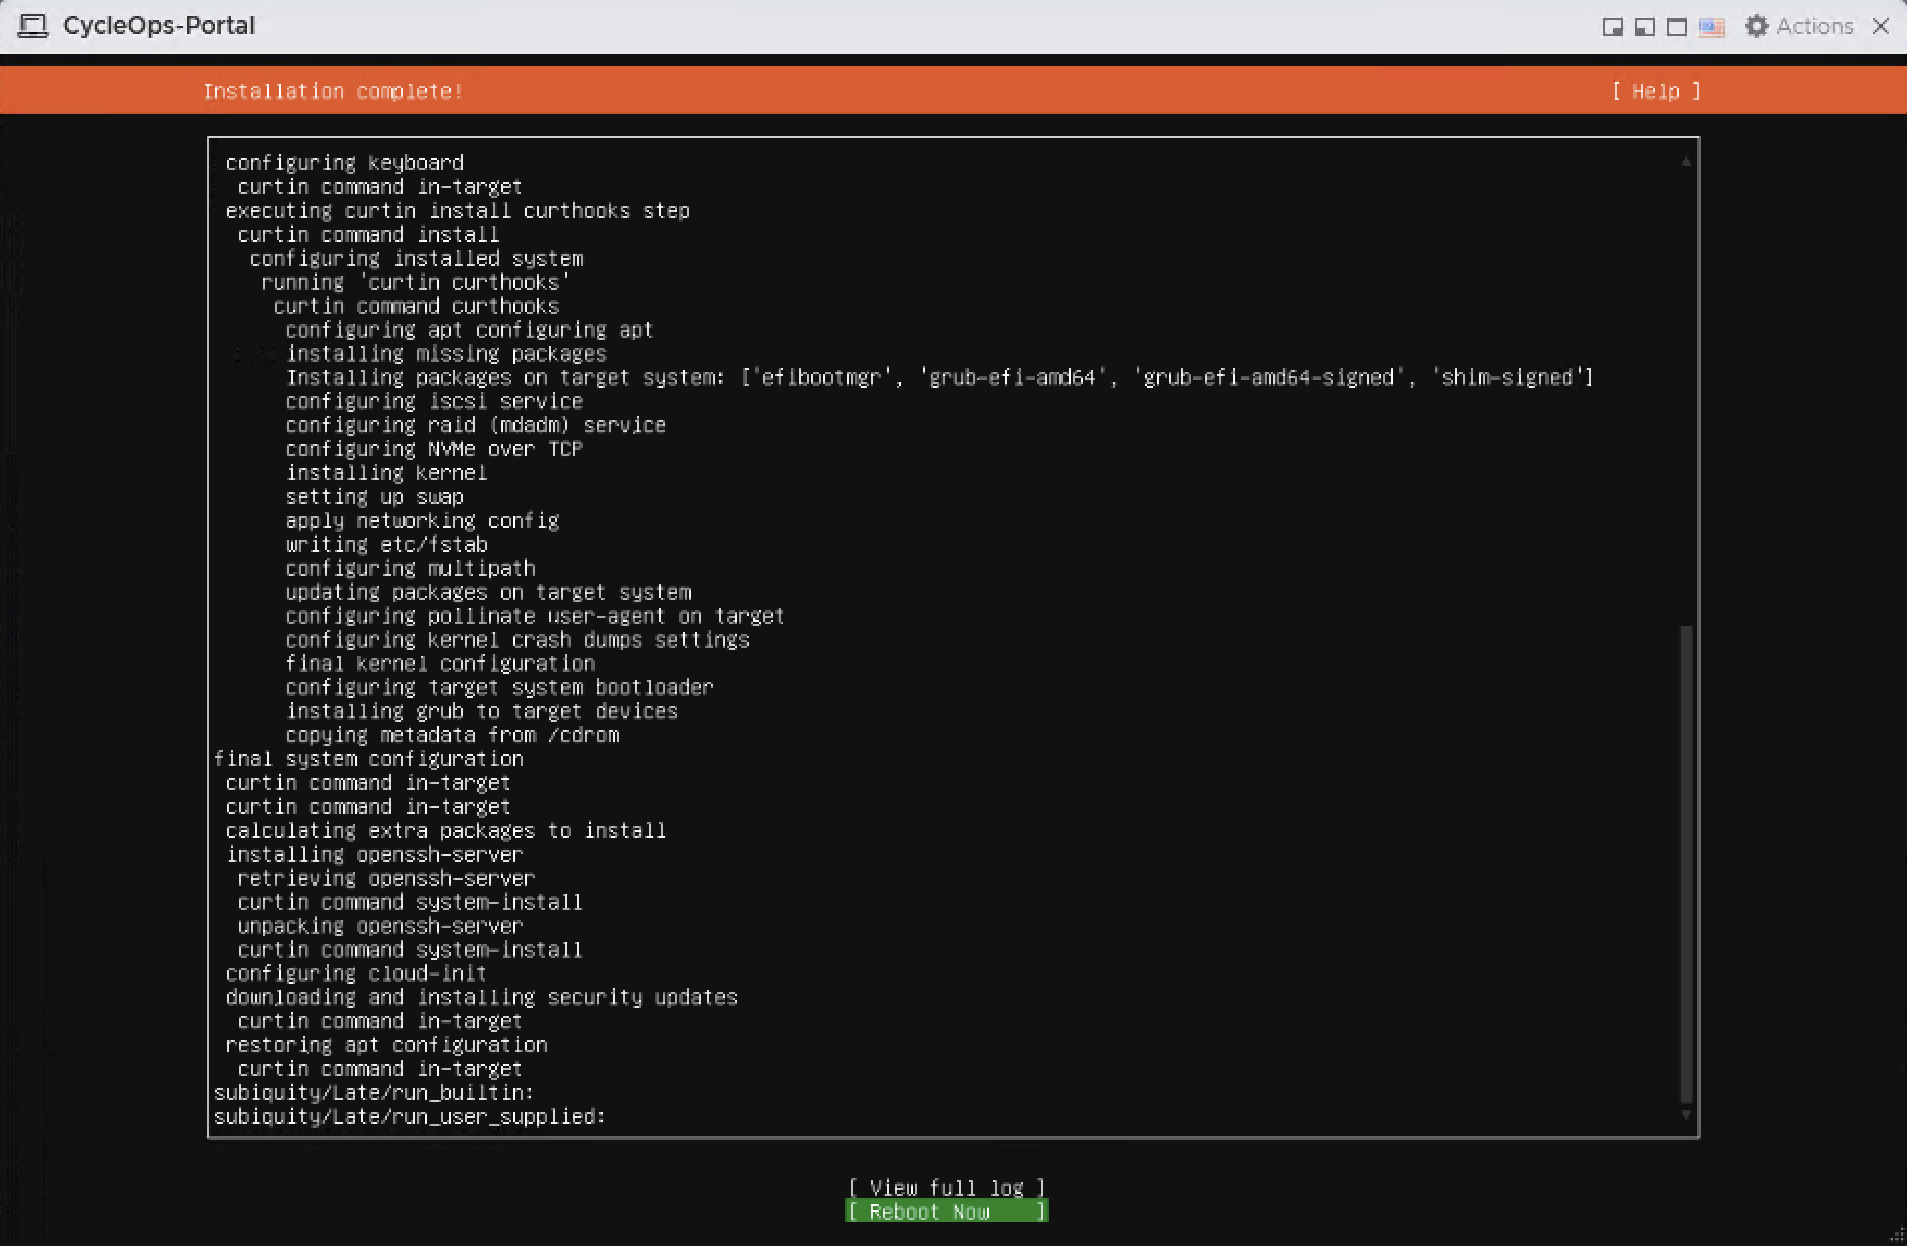
The page shows the installation progress. The installation is finished when the title reads Installation complete! and the Reboot Now button appears at the bottom of the page.
Installation complete page with the Reboot Now buttonStep 5
Post-installation
After the installation, reboot the server, detach the image, and bring the system up to date.
5.1 Reboot and detach the image
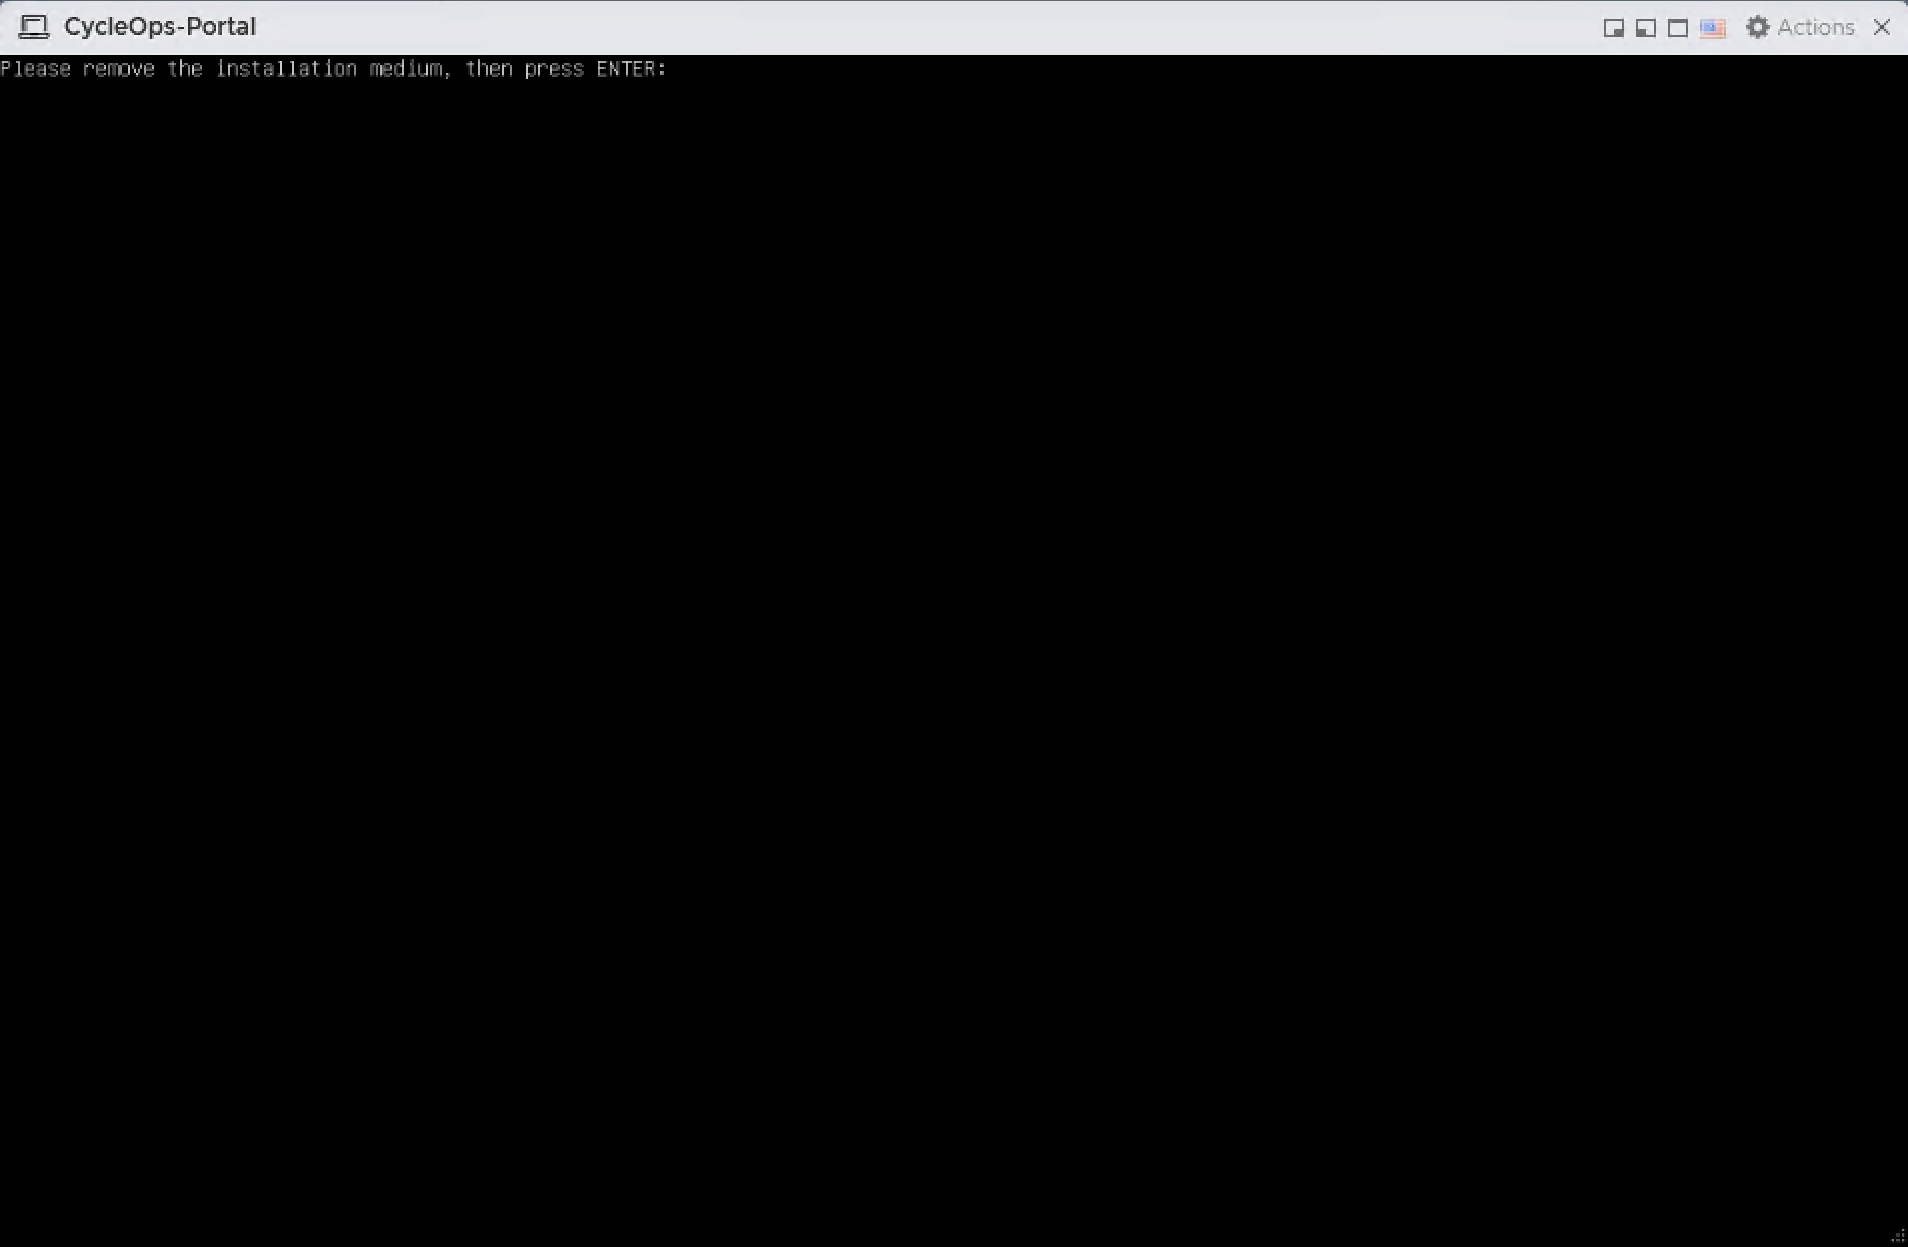
Select Reboot Now. If "Please remove the installation medium, then press ENTER" appears, press Enter.
Remove the installation medium prompt
In ESXi Host Client, open Edit for the virtual machine and uncheck Connect and Connect at power on for CD/DVD Drive 1.
5.2 Connect over SSH
Connect from your management computer. On the first connection, answer yes to the host key prompt and enter the user password.
ssh coadmin@10.0.1.191
5.3 Update packages
Update the package lists, upgrade all packages, and reboot.
The timedatectl output should show System clock synchronized: yes.
Step 6
Verification checklist
The server is ready for the Portal installation when all six checks return the expected result.
Check
Command
Expected result
OS release
lsb_release -d
Ubuntu 26.04.1 LTS
Hostname
hostnamectl hostname
cycleops-portal
IP address
ip -4 addr show ens192
The static address you assigned
CPU and memory
nproc; free -h
8 cores, about 16 GiB memory, 8 GiB swap
Disk
df -h /
ext4 root of about 91 GB
Internet and DNS
ping -c 3 archive.ubuntu.com
Replies received, no packet loss
Step 7
Install the CycleOps Portal
The Portal is installed with a single script, portalinstall.sh. The script installs Docker, downloads and loads the Portal package, creates the certificates and configuration, and starts the services. Two short tasks then follow on the main server.
The portalinstall.sh installer, the version tag, and the package token provided by the CycleOps team. This is the same package token used for the main server; the image token is not needed here.
HTTPS access (TCP 443) from the Portal server to api.github.com, get.docker.com, download.docker.com, and registry-1.docker.io.
Access from the Portal server to TCP 8443 on the main server, for example 10.0.1.190:8443.
7.2 Copy the installer and start it
On your management computer, run this from the folder that contains portalinstall.sh. Any SFTP client, such as WinSCP, works as well.
scp portalinstall.sh coadmin@10.0.1.191:/tmp/
Then start the installation on the Portal server:
sudo bash /tmp/portalinstall.sh
The installer currently prints its messages in Turkish. The terminal output in this section is shown translated to English, in the same order as it appears on screen.
The script runs its pre-checks and installs Docker. All lines must show [OK].
7.3 Answer the questions and enter the package token
The script asks the following questions in order. The value in square brackets is the default; pressing Enter accepts it.
Prompt
Answer
IP address of this DMZ server
Enter; the server address is pre-filled
IP address of the CycleOps MAIN server
The main server address, for example 10.0.1.190
Distribution repository
Enter
Version tag
The same version as the main server
GitHub token
The package token; the characters are not shown as you paste
==> 3/8  Details
  IP address of this DMZ server [10.0.1.191]:
  IP address of the CycleOps MAIN server: 10.0.1.190
  Distribution repository [sealtinay/cycleops-dist]:
  Version tag (SAME as the main server, e.g. v04ef16a3): v2e14d45a
  [OK] DMZ 10.0.1.191 · main server 10.0.1.190 · v2e14d45a
==> 4/8  Download the Portal package
  Distribution token (classic PAT, repo scope) — NOT the GHCR token.
  GitHub token (not shown on screen):
  downloading: portal-dir.tar.gz (0.0 MB)
  downloading: portal-images.tar.gz (79.5 MB)
  [OK] portal-images.tar.gz + portal-dir.tar.gz
==> 5/8  Extract and load the images
  Loaded image: cycleops/portal-api:0.1.0
  Loaded image: cycleops/portal-web:0.1.0
  [OK] /opt/cycleops-portal ready
The prompt mentions a "classic PAT"; enter the package token provided by the CycleOps team regardless of its type.
7.4 Paste the internal gateway certificate
The Portal connects to the main server over TLS and needs the main server's internal certificate. When the script stops at this prompt, run the following command on the main server:
Copy the whole output, including the -----BEGIN CERTIFICATE----- and -----END CERTIFICATE----- lines, paste it into the Portal installer, and press Ctrl-D. Answer h (no) when asked whether Cloudflare will be used.
==> 6/8  Certificates
  [OK] portal TLS created (5 years)

  Internal gateway certificate required. On the main server:
    sudo cat /opt/cycleops/infra/nginx/gateway-internal-certs/gateway-internal.crt
  Paste the output here:
  Press Ctrl-D after pasting:
-----BEGIN CERTIFICATE-----
MIIF1jCCA76gAwIBAgIU...
...
-----END CERTIFICATE-----
  [OK] upstream CA written
  Will Cloudflare be used? (e/h) [h]: h
  [OK] permissions (644/755 for AppArmor)
7.5 Complete the configuration
The configuration stage asks a few more questions. The customer code and display name are required.
Prompt
Answer
Main server address (https://IP:8443)
Enter; the address is pre-filled
IP of the DMZ server (for CORS)
Enter
Customer code
Lowercase letters, digits, and hyphens, for example customer
Customer display name
For example CUSTOMER
Will Cloudflare be used?
h (no)
==> 7/8  Configuration
Internal gateway (CycleOps main server)
  NOTE: port 8443 — NOT 443.
  Main server address (https://IP:8443) [https://10.0.1.190:8443]:

This portal server
  IP of the DMZ server (for CORS) [10.0.1.191]:
  Customer code (lowercase letters/digits/hyphens): customer
  Customer display name: CUSTOMER

  Shared token generated (write the SAME value to the internal gateway .env):
    GATEWAY_PORTAL_SHARED_SECRET=<SHARED_TOKEN>

Cloudflare (mobile app / roaming agent relay)
  Will Cloudflare be used? (e/H): h
== .env written ==
  [OK] .env ready
==> 8/8  Start the services
  [OK] portal-nginx recreated
  containers:
portal-nginx  Up 8 seconds
portal-api  Up 9 seconds (healthy)
portal-redis  Up 20 seconds (healthy)
portal-web  Up 20 seconds (healthy)
  https://localhost : 200
All four containers must be Up and the last line must read https://localhost : 200. The script then prints the commands to run on the main server, with your shared token already filled in.
7.6 Register the Portal on the main server
Run both tasks on the main server. Until they are done, the Portal cannot connect to the main server.
First, add the shared token and recreate the gateway. Replace <SHARED_TOKEN> with the value the Portal installer printed:
echo 'GATEWAY_PORTAL_ENABLED=true' | sudo tee -a /opt/cycleops/.env >/dev/null
echo 'GATEWAY_PORTAL_SHARED_SECRET=<SHARED_TOKEN>' | sudo tee -a /opt/cycleops/.env >/dev/null
sudo grep '^GATEWAY_PORTAL' /opt/cycleops/.env
cd /opt/cycleops/infra && sudo docker compose up -d --force-recreate gateway
The grep command must show exactly two lines.
Second, allow the Portal server's address:
sudo cycleops portal allow 10.0.1.191
sudo cycleops portal list
During the configuration stage the installer also suggests writing an allow line to local.conf and restarting nginx. Use cycleops portal allow instead: it validates the address and the nginx configuration and reloads without downtime.
The 403 shows that requests without the token are rejected, and the 422 shows that the Portal reaches the main server with its token. If the request with the token also returns 403, the allow step in 7.6 has not been applied.
Finally, open https://10.0.1.191 (your Portal address) in a browser. A browser security warning is expected with a self-signed certificate.
Installation complete. The Portal is now reachable from your internal network. Internet access, the mobile app, and agents outside the corporate network additionally require the Cloudflare configuration, which will be covered in a separate guide.